New Features: Unterschied zwischen den Versionen
Keine Bearbeitungszusammenfassung |
Keine Bearbeitungszusammenfassung |
||
| Zeile 132: | Zeile 132: | ||
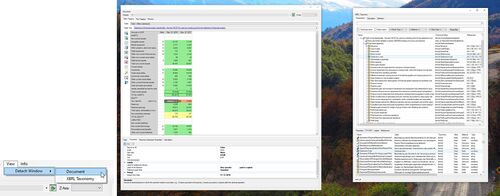
Does the Tagger sometimes feel to small for all the functionality it provides? With Tagger version 1.8 you can now make full usage of multiple displays while tagging. Simply use the Detach Controls feature and independently move the windows around your desktops: | Does the Tagger sometimes feel to small for all the functionality it provides? With Tagger version 1.8 you can now make full usage of multiple displays while tagging. Simply use the Detach Controls feature and independently move the windows around your desktops: | ||
[[Datei:EN Word Screenshot Detach Controls.jpg|center|500px]] | |||
Version vom 21. Oktober 2021, 15:18 Uhr
Double/Multiple Tagging for PDF documents
In some reports some content has to be tagged more than once. This can be two tags for the same table cell, two tags for the same text or a text block around a table that is already tagged. With Tagger version 1.8 we are adding tagging layers to PDF documents. Each layer can then be tagged independently. When creating a result document, all the tags will be merged according to the iXBRL specifications.
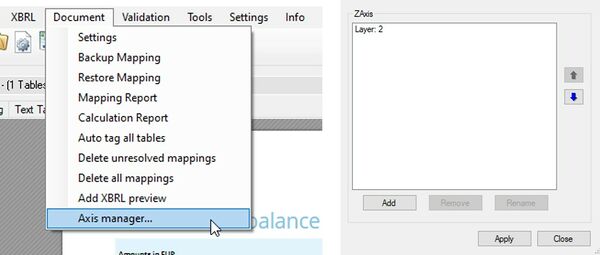
To get started, first load your document as usual and then add a new layer via the axis manager:
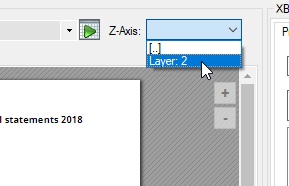
While one additional layer is enough for most reports, it is possible to add more than that. After clicking on apply you can select the new layer in the Z-Axis dropdown, with "[..]" being your default layer:
Once you switch the layer, you will see that all current tags have been hidden in the other layer and you can tag on a blank page.
- If you want to tag the same table cell twice, just tag the table again and then the desired cell (you don't have to tag the whole table again in Layer 2)
- If you want to create an additional textblock tag around the table, just select the table and tag the textblock
- If you want to tag the same text twice, just select and tag it in both layers
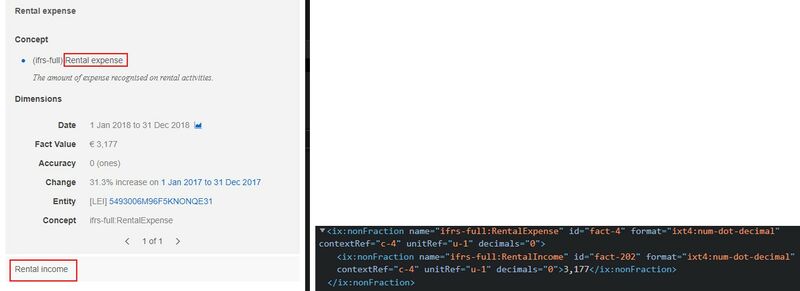
When you now create a result document and select the double tagged cell in the preview, the viewer will show two tags and the tags are properly nested in the document:
Continuations
In reporting text that belongs to a single XBRL textblock or text tag might be in several places in the document. XBRL has a mechanism called continuation for this case that essentially tells the XBRL processors to merge all the content that has been tagged with this tag and is part of the continuation for the output. From Tagger version 1.8 the places to continue a tag can not explicitly be selected:
Abstract hierarchy customizer
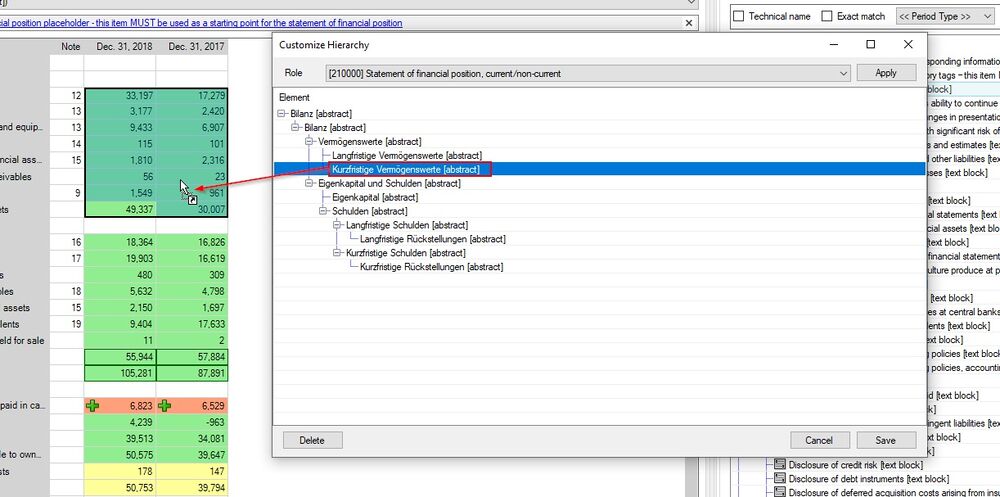
In addition to the Dimension Hierarchy Customizer (Document_Tagging#Customizing_the_dimensional_hierarchy Customizing_the_dimensional_hierarchy) Tagger 1.8 adds a similar feature for Abstract Hierarchies. If the hierarchy of a statement in your report does not resemble the one in the ESEF taxonomy, you can now rearrange the positions and levels, add additional abstracts from the taxonomy and remove abstracts that are part of the default:
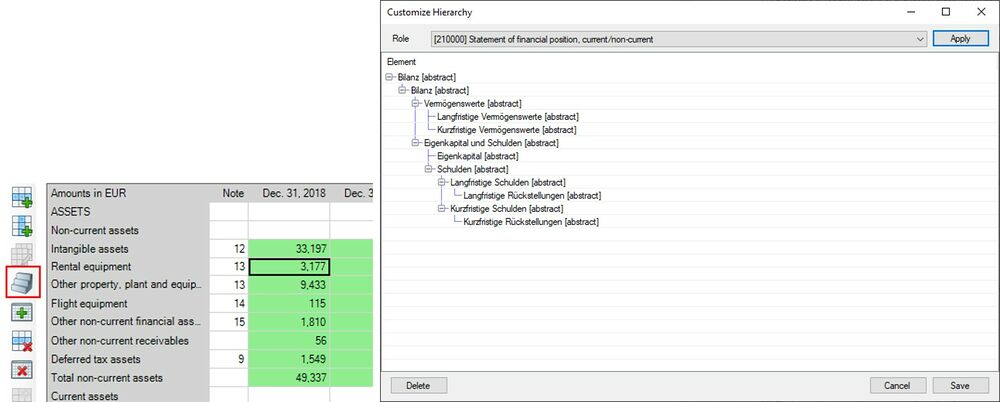
Just select the hierarchy customizer for your table, select the role from which you want to copy the initial hierarchy and then drag and drop abstracts to this hierarchy. Once your are done, you drag and drop the abstract for a specific tag from this dialog onto the relevant tags, just as you did before from the taxonomy:
Rearranging the row order
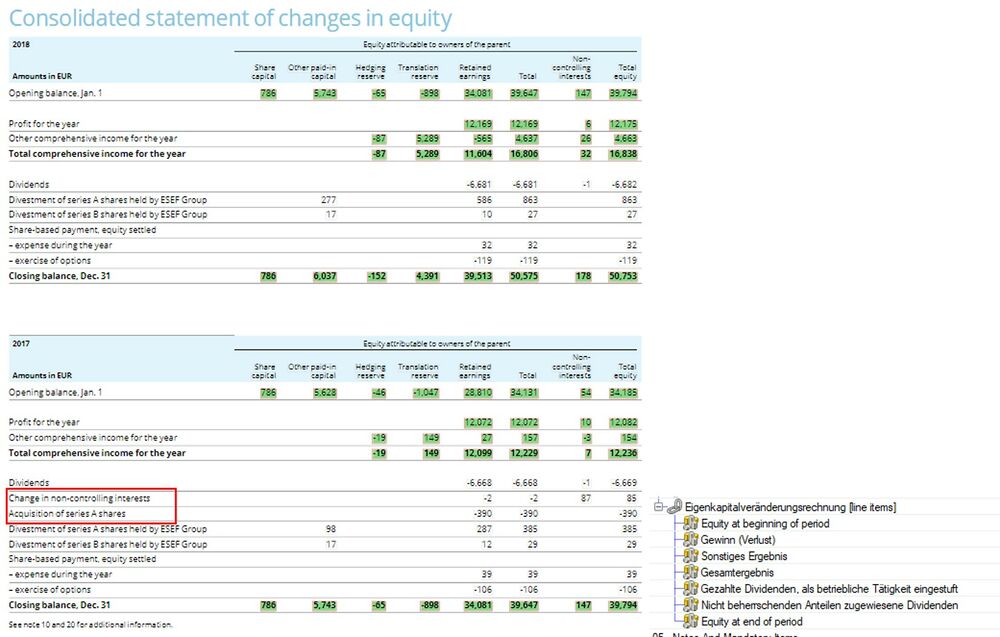
It is important to bear in mind, that the structure of statements in your company specific XBRL taxonomy extension will differ from what you have in the report. One such case is for example the following Statement of Changes in Equity. In the example report we can find two separate tables, one for each year. In the resulting taxonomy we will only have one combined table, with the period being selectable. In the below example we can further see that the table for 2017 has two rows more than the one for 2018. Where exactly these two rows are supposed to be placed in a combined table is up to the Filer and/or Auditor. Per default they will just be added at the end, as shown below.
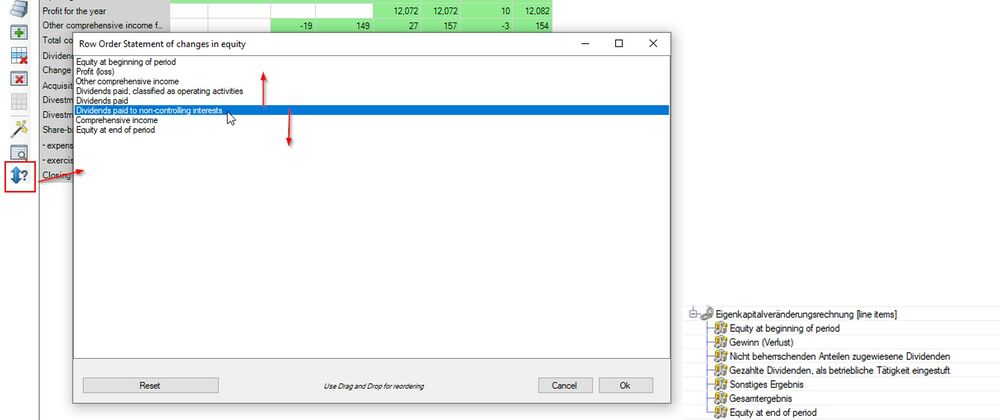
With the new custom row ordering feature, this can easily be changed by you, just click on the highlighted button and rearrange the rows to your requirements, the result in the extension taxonomy will change accordingly:
Custom date formats
There are countless ways to represent a date, it is challenging to support all formats automatically in the Tagger. If a date is not recognized by default, from Tagger version 1.8 a custom format description can be created for the table in question.
Click on the table properties after selecting the table in question. The following window opens with a new setting ("Custom date formats"). Click in the right empty cell. A button appears. This opens the editor for user-defined date formats.
Add a new format using the + Button, this opens the editor for user-defined date formats. It is possible to add multiple formats for a table if necessary. All formats have to be described by regular expressions. A good introduction can be found here: https://github.com/ziishaned/learn-regex/blob/master/translations/README-de.md.
New Settings
Three further new features can be enabled or disabled from the Tagger Settings:
Readonly Properties
If this is set to read only, changing tagging properties for cells that have been set to the Final status can no longer be changed. To change these cells revert to status to In Edit or Review Pending.
Document View Type
It is now possible to define the view type for converted Word documents. The available options are FullScreen, Manuscript and Pages. Just try them out to see what fits your report best.
Auto Save
The Tagger has now an Auto Save feature to prevent accidental loss of work. If your PC crashes and you have not saved your work, you will get a prompt on the next load of the document if you want to restore the latest auto save backup rather then the original mapping file. This option deactivates this mechanism if it is not desired.
Two new features have been added to the Document Settings:
Roll Forward
The Tagger usually detects changes in table headers during a roll forward and adjusts the mapping periods accordingly. For tables that don't have the date explicitly in the header, for example Statement of Changes in Equity, this option moves the mapping periods forward according to the date set in the document settings. Just select "Yes" and click on OK for a roll forward. This option will always be "No" by default and also after a roll forward.
Table Order
Usually the table order in the extension taxonomy should resemble the order of tables in the actual report. In some jurisdictions or auditors' opinions it has to exactly resemble the order in the original taxonomy. To achieve this just enable this option.
Calculation Validation
Failed calculations in XBRL are often just rounding errors, and thus ignored by most filers and regulators. Sometimes the actual delta between the calculated value and the tagged value is so too big to be a rounding error, so it would make more sense to be an error than a warning. This behavior can now be changed in the XBRL Processor settings:
You can enable or disable this functionality and also set the threshold for when a calculation warning should become an error.
Detach Controls
Does the Tagger sometimes feel to small for all the functionality it provides? With Tagger version 1.8 you can now make full usage of multiple displays while tagging. Simply use the Detach Controls feature and independently move the windows around your desktops:
