New Features
firesys-Version 22.3.1
Tag PDF documents with TextBlocks from tagged Word documents
For many issuers a report creation process begins with a Word document. While the report itself is being created in Word, the final document is, for layout reasons, sometimes a PDF. While tagging text blocks in Word and maintaining those tags through different versions is very reliable, doing so in PDF is technically more challenging.
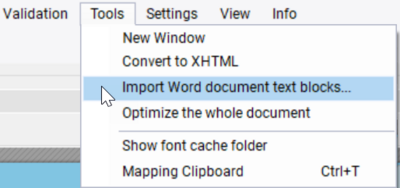
If your working document is a Word document but your final document to be tagged and published is a PDF, from firesys version 22.3.1 onwards we can offer a reliable way to restore all tagged text blocks from a Word document to the PDF. This even works with nested tags. When the time has come to tag the PDF, open it in toolsxbrl, set the default settings and then choose the "Import Word document text blocks" option from the "Tools" section:
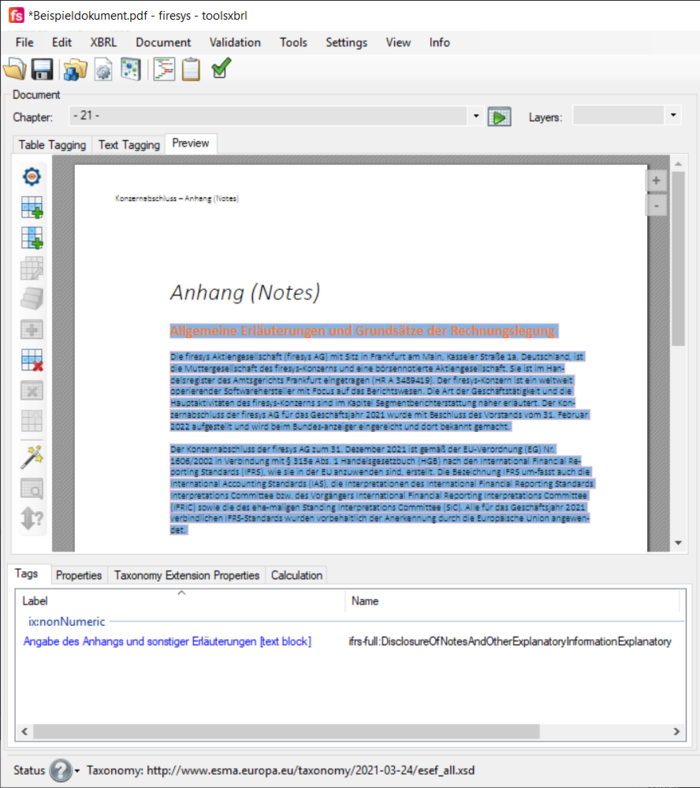
Choose your tagged Word document and toolsxbrl will apply all text block tags to the PDF. Make sure you apply the Word document to a PDF document based on the same version of the content. Once toolsxbrl is done applying the tags you can see them as usual in both the Preview and the Text Tagging tab.
Copy Textblock Tags through the Mapping Clipboard
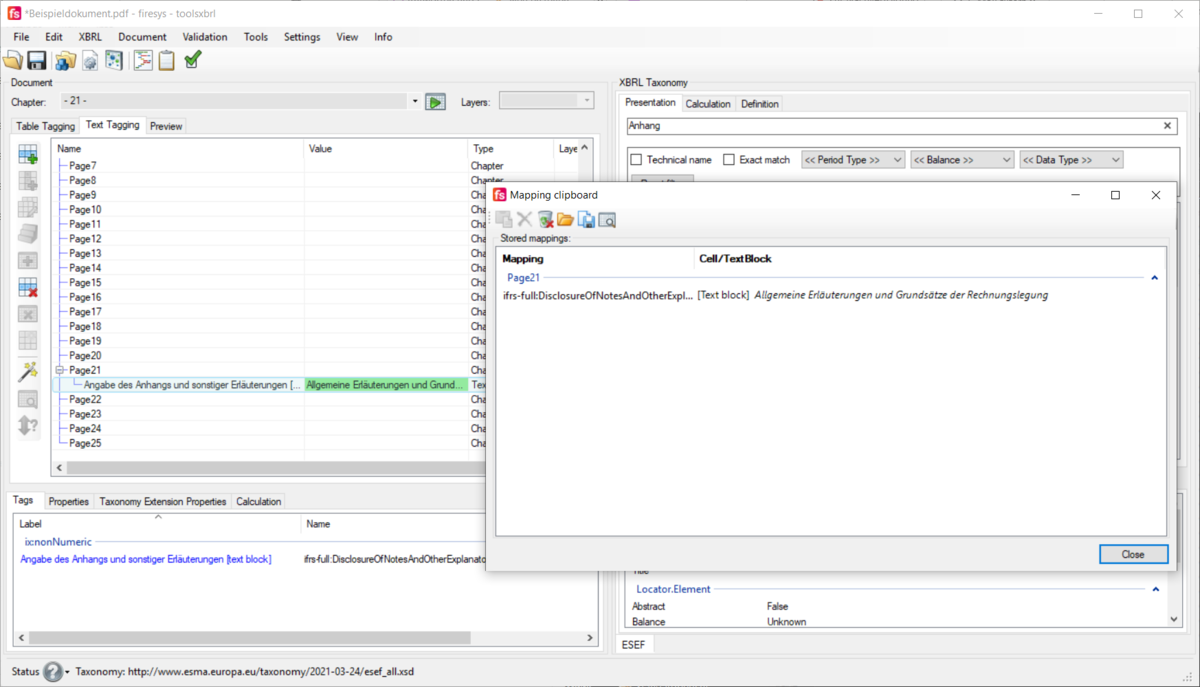
The Mapping Clipboard is a powerful tool to work with your report and also transfer tags from one version of a tagged document to another. So far it only supported tags in tables, from firesys version 22.3.1 onwards it also supports text block tags.
Settings and LEI-Search
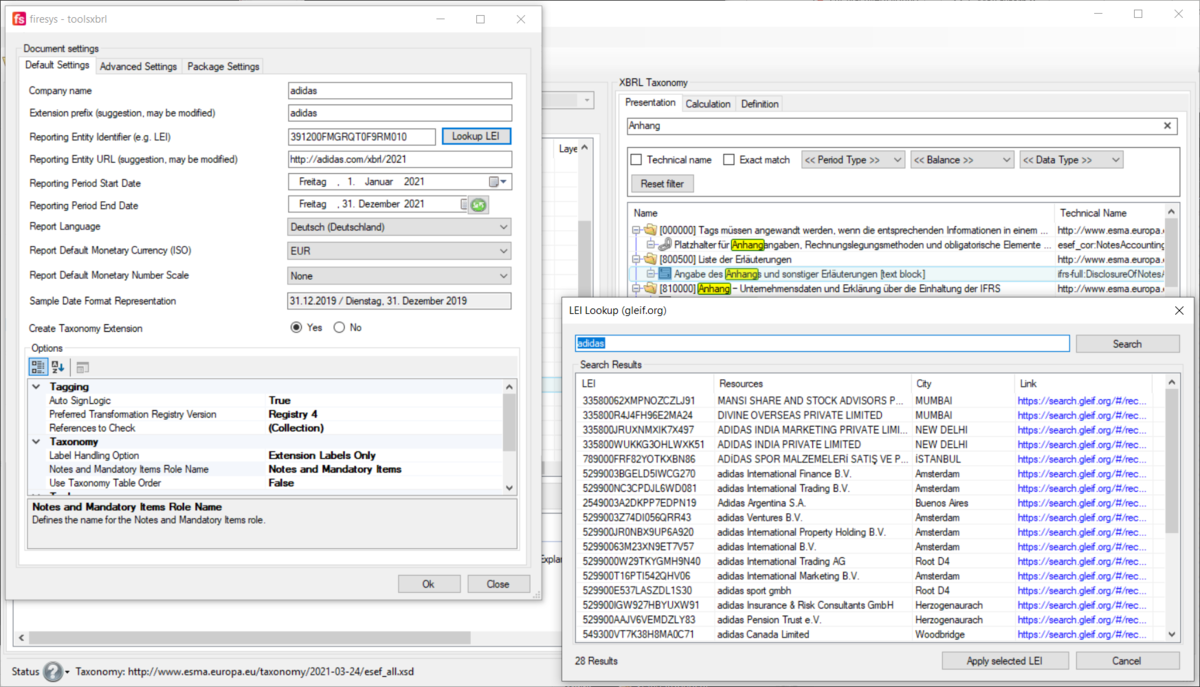
The settings dialog has been improved and provides a more clear interface and further information to most of the settings. It is now also possible to change the role name for the Names And Mandatory Items role in the settings. The LEI-Search dialog has also been improved and shows more results from the official GLEIF database.
Mini Disclosure Checklist
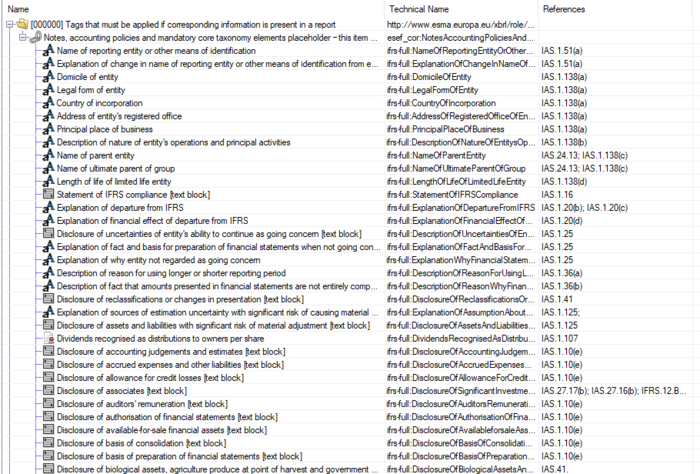
From 2022 onwards the ESEF requirements mandates text block tagging, all mandatory tags from the role 000000 in the ESEF taxonomy have to be tagged if the content is present in the document and the tag is material to the issuer. All the mandatory tags have references to the respective sections in the standard:
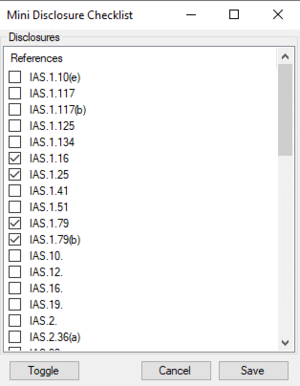
toolsxbrl now allows the issuer to select the references which are material to the report, and then the validation will show a warning for all the tags that are actually referenced by that selection. To enable this feature, just go to the document settings and select the three dots for the "References to Check" property in the Options.
Now the Mini Disclosure Checklist appears and the references to be checked can be selected and saved.
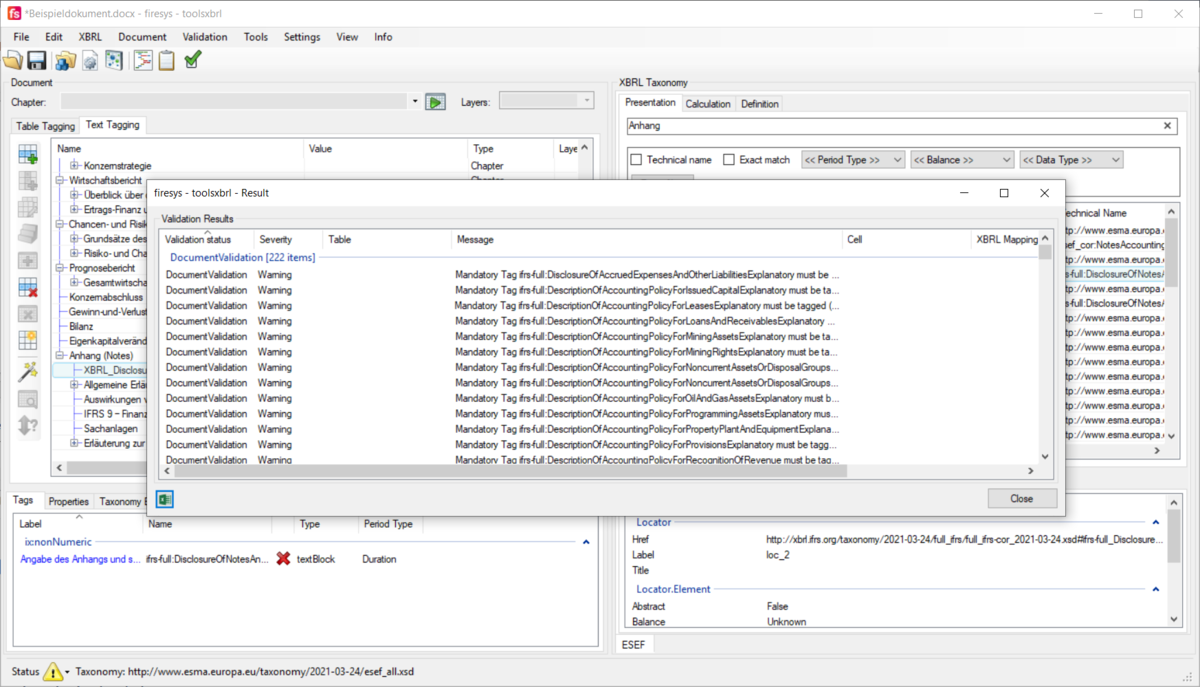
From now on, when the user validates the document, all tags that are not yet tagged and referenced by the selection will show up as a warning.
Information about Reportwide Calculations
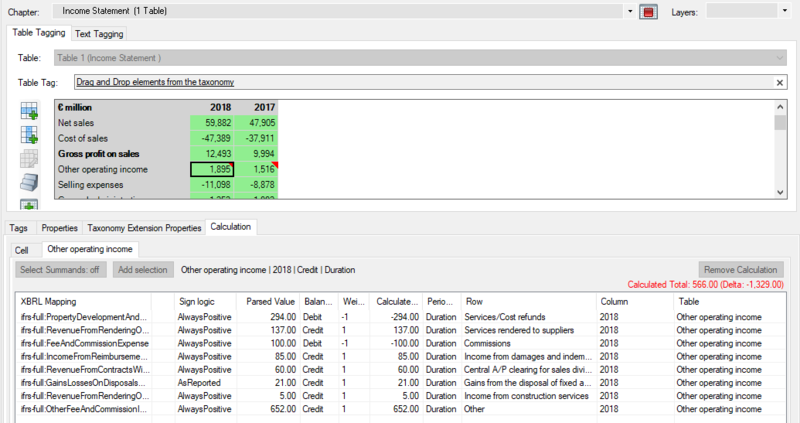
We have improved toolsxbrl to make it clearer how and where reportwide calculations affect the report:
In the example above the tagged cell for "Other operating income" does not have a calculation itself, since it is part of another calculation in the "Income Statement". In the table "Other operating income" however, this tag is actually the total of the values in that table. Since the calculation for the "Other operating income" table is also valid for the tag at this position in the report, it is now also being shown here besides a possible calculation for this "Cell". The summands being shown are the summands that are valid in the context of this given cell, meaning if you have added a calculation for certain dimensions, it would show the values for tags existing in the dimension selection for the selected cells. This will make it more transparent why a calculation in another part of the report might lead to a calculation warning in the currently selected table. All calculation that have not been created for the selected cell can only be edited in the original cell.
Improvements for table tags
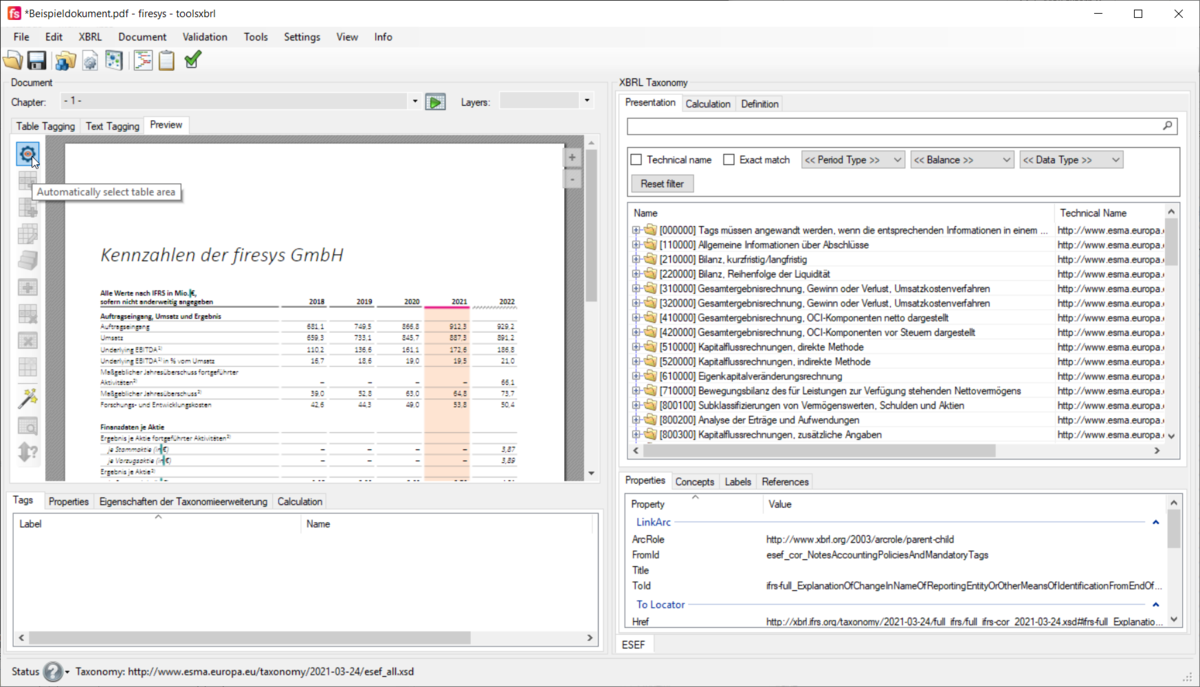
toolsxbrl now has a new smart AI-powered feature that will help you selecting tables in PDF documents. While you had to manually select tables in prior versions, you can now click the "Automatically select table area" button in the upper left corner of the preview pane:
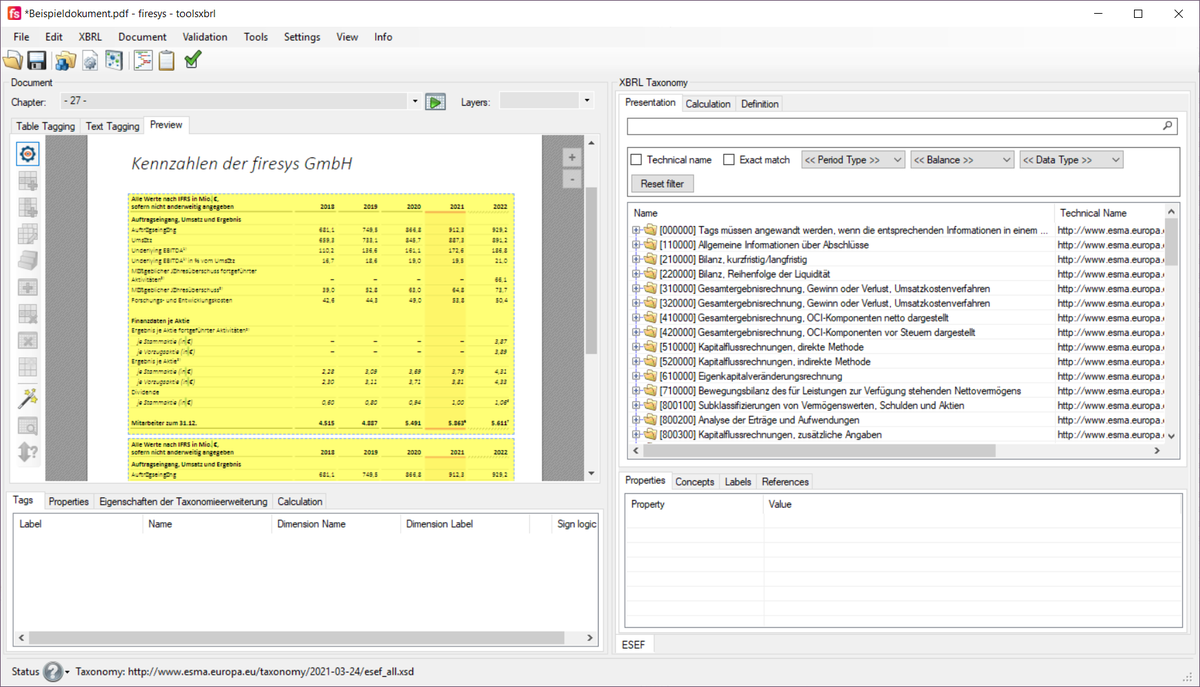
Then toolsxbrl will use the AI to select the tables available on the page. If there are multiple tables, it will highlight all of them:
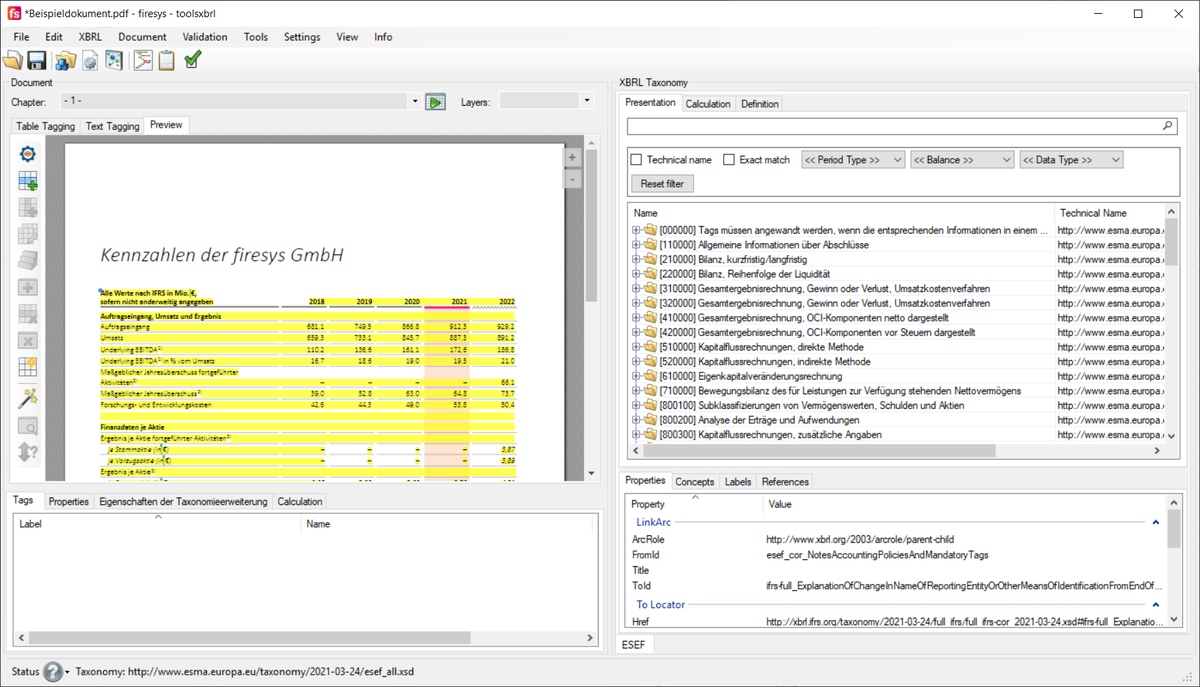
You can then simply select the table you want to tag, manually adjust the area if necessary and tag the table as usual:
-->
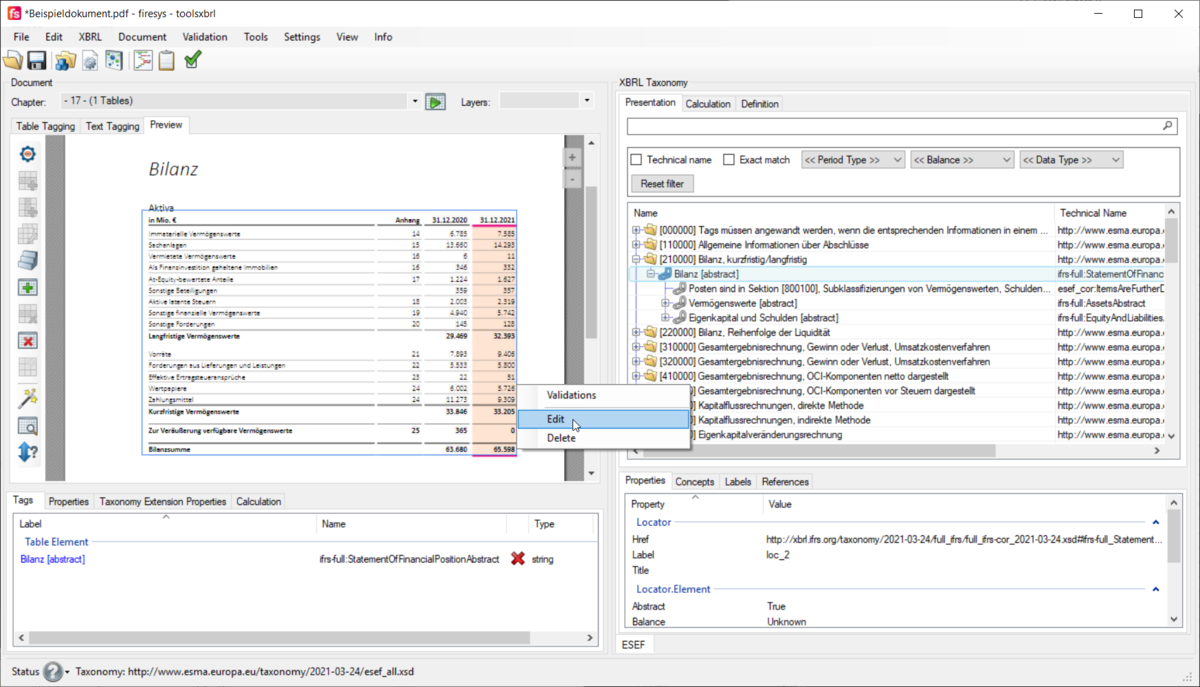
You can change the table area even when you already have a table tag and cell tags applied to it. Just right click the border, click „Edit“ and then adjust the area. All tags that are within the newly selected area will be kept:
Improvements to textblock-tagging
We have vastly improved the algorithm for textblock-restoration to make tagging documents, that are still a work in progress, more reliable. toolsxbrl is now able to restore most textblock-tags, even in the following situations:
- A text block moves from version 1 to version 2 to another page.
- A text block that was on one page in version 1 wraps to two pages in version 2.
- Words are inserted or deleted within a text block.
- Paragraphs are inserted or deleted within a text block.
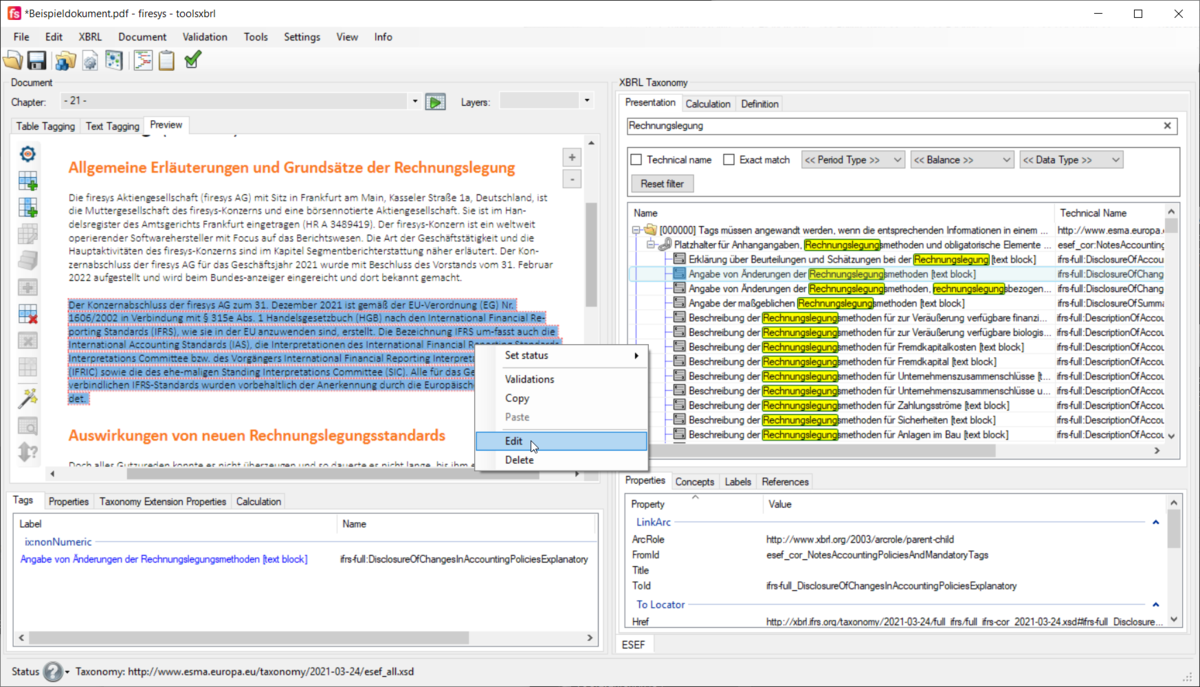
To furthermore support this process it is now also possible to edit the area of a textblock-tag, without having to retag it:
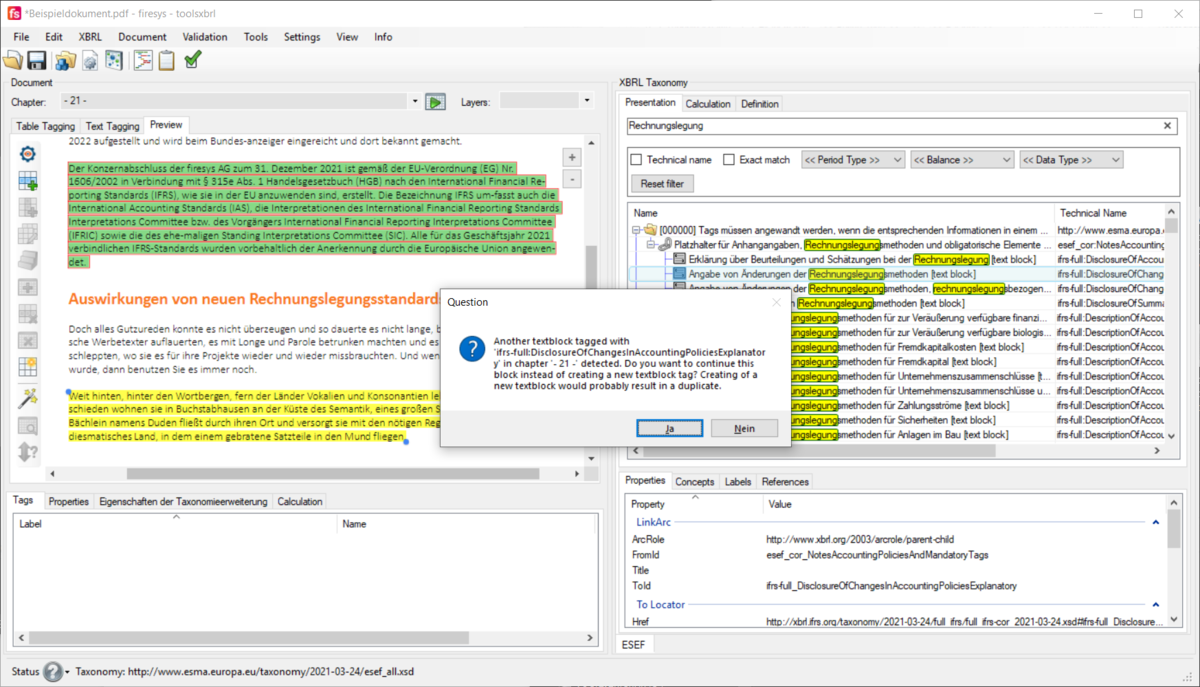
When you have to use the same tag in multiple areas of your report, the XBRL concept of continuations are the way to go. We have also simplified the way to tag those. Whenever you use a textblock-tag that you have already tagged to a different area, you will be asked if this is supposed to be a continuation of the already existing tag. If you select yes, the continuation will automatically be set in the correct order.
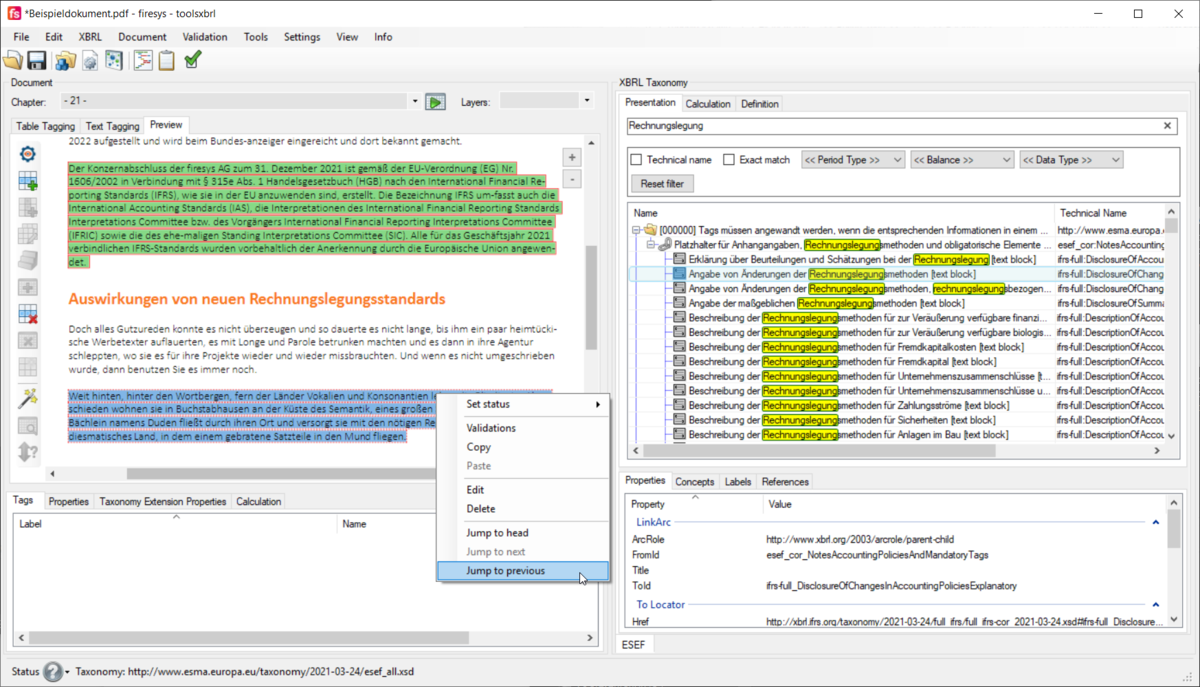
You can now also jump between all continuations of a textblock-tag, by rightclicking one instance and using the "jump to" functionality:
Big Textblock tagging for the full notes from page to page (PDF)
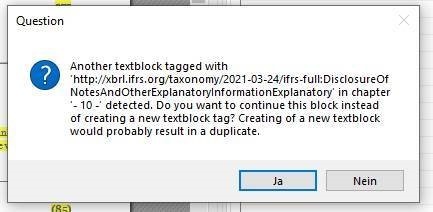
Create or use a new layer. Tag the first page with the Tag for example: “Disclosure of notes and other explanatory information”. Go to the last page of your notes section and repeat the step. You will get this screen. Answer it with yes:
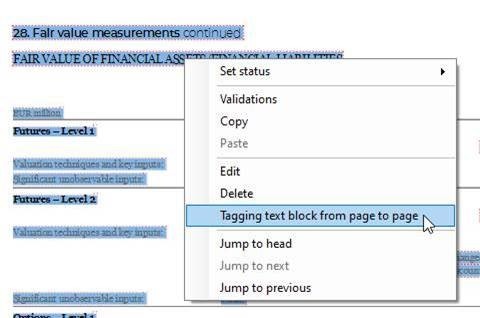
Rightclick on the tagged text and chose this part of the menu:
Answer the next window with yes:
After this all pages will be tagged.
If you work with a word document: To insert the whole notes section (“Disclosure of notes and other explanatory information [text block]”) into your word document, you need to select all the text you wish of your document and insert the Content Control and the Technical Name as it would for any tag, but please note that the selection of the text must be made under a headline, for example the first one in the document.
Further improvements
- PDF: toolsxbrl now shows the "true" page numbers of a document (according to information in the PDF) in the chapter selection
- PDF: In accordance with the new ESEF reporting manual section 2.2.6 whitespaces of PDF documents will be preserved to ensure readability of the content in the XBRL layer.
- Calculation Linkbase 1.1: While not yet mandatory for ESEF, the new implementation of the calculation linkbase in version 1.1 can be chosen in the settings.
See also
![]() The Toolsxbrl Functions
The Toolsxbrl Functions
![]() First Steps
First Steps
![]() Interface and toolsxbrl Settings
Interface and toolsxbrl Settings
![]() Document Tagging
Document Tagging
![]() Validation
Validation
![]() Generate an XBRL Document
Generate an XBRL Document
![]() IXBRL Taxonomies, Reports, and Common Errors
IXBRL Taxonomies, Reports, and Common Errors

