Tagging of Textblocks (Notes) and Mandatory Items: Unterschied zwischen den Versionen
Keine Bearbeitungszusammenfassung |
Keine Bearbeitungszusammenfassung |
||
| Zeile 178: | Zeile 178: | ||
To get started, first load your document as usual and then add a new layer via the '''layers manager''': | To get started, first load your document as usual and then add a new layer via the '''layers manager''': | ||
[[ | [[Datei:DoubleMultiple_Textblock_Tagging_for_PDF_Documents1.png|center|500px]] | ||
[[ | [[Datei:DoubleMultiple_Textblock_Tagging_for_PDF_Documents2.png|center|500px]] | ||
While one additional layer is enough for most reports, it is possible to add more than that. After clicking on apply you can select the new layer in the '''Layers''' dropdown, with "[..]" being your default layer: | While one additional layer is enough for most reports, it is possible to add more than that. After clicking on apply you can select the new layer in the '''Layers''' dropdown, with "[..]" being your default layer: | ||
[[ | [[Datei:DoubleMultiple_Textblock_Tagging_for_PDF_Documents3.png|center|250px]] | ||
Once you switch the layer, you will see that all current tags have been hidden in the other layer and you can tag on a blank page. | Once you switch the layer, you will see that all current tags have been hidden in the other layer and you can tag on a blank page. | ||
| Zeile 191: | Zeile 191: | ||
* If you want to tag the same text twice, just select and tag it in both layers. | * If you want to tag the same text twice, just select and tag it in both layers. | ||
[[ | [[Datei:DoubleMultiple_Textblock_Tagging_for_PDF_Documents4.png|center|750px]] | ||
When you now create a result document and select the '''nested text block''' in the preview, the viewer will show two tags and the tags are properly nested in the document: | When you now create a result document and select the '''nested text block''' in the preview, the viewer will show two tags and the tags are properly nested in the document: | ||
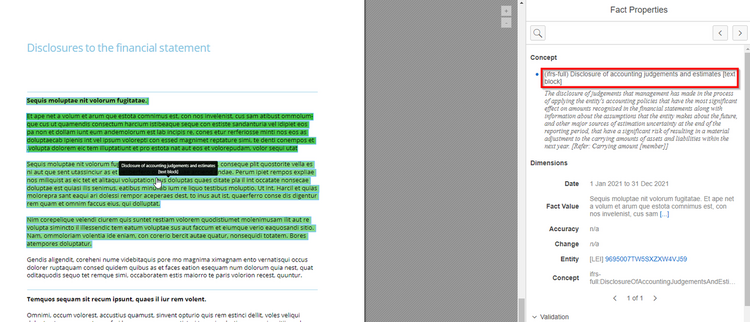
[[ | [[Datei:DoubleMultiple_Textblock_Tagging_for_PDF_Documents5.png|center|750px]] | ||
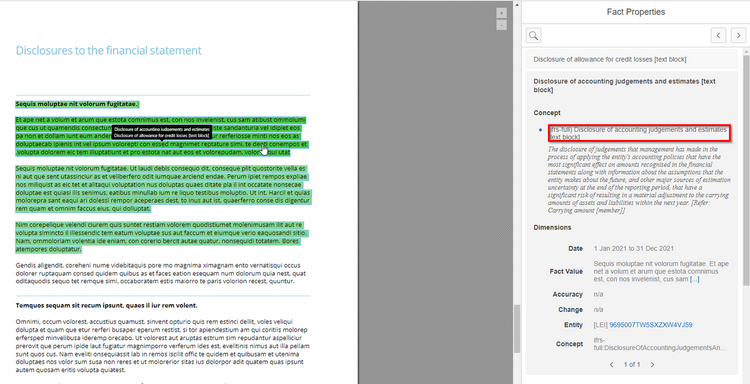
[[ | [[Datei:DoubleMultiple_Textblock_Tagging_for_PDF_Documents6.png|center|750px]] | ||
Version vom 19. Oktober 2023, 13:22 Uhr
Text (Narrative Disclosure)
Apart from tagging values in tables, it is also possible to tag text (narrative disclosure) with the respective elements from the taxonomy.
For reports beginning on or after Jan 1, 2022, text block tagging has become mandatory. Accordingly, the entire notes section to the financial statements must be tagged with the so-called text block elements for the first time. The tags required for this task, with which the individual accounting policies, disclosures and also a handful of other information in the notes are to be tagged, can be found in ANNEX II of the ESEF Regulation (EUR-Lex - 02019R0815-20220101 - EN - EUR-Lex - Your gateway to the EU, News, Highlights | European Union). It is important to consider the last modified version from 2022, as the list has been updated with new tags. Most of the tags are also listed in the ESEF taxonomy in the role [000000].
The following 11 tags are missing from this role in the 2021 taxonomy version, so the legislative text must be considered leading:
| Role | Technical Name |
| 810000 | ifrs-full:DividendsProposedOrDeclaredBeforeFinancialStatementsAuthorisedForIssueButNotRecognisedAsDistributionToOwners |
| 810000 | ifrs-full:DividendsProposedOrDeclaredBeforeFinancialStatementsAuthorisedForIssueButNotRecognisedAsDistributionToOwnersPerShare |
| 800500 | ifrs-full:DisclosureOfBorrowingCostsExplanatory |
| 800500 | ifrs-full:DisclosureOfConsolidatedAndSeparateFinancialStatementsExplanatory |
| 800500 | ifrs-full:DisclosureOfHyperinflationaryReportingExplanatory |
| 800500 | ifrs-full:DisclosureOfInterestsInOtherEntitiesExplanatory |
| 800500 | ifrs-full:DisclosureOfInterimFinancialReportingExplanatory |
| 800500 | ifrs-full:DisclosureOfNotesAndOtherExplanatoryInformationExplanatory |
| 800500 | ifrs-full:DisclosureOfOtherProvisionsContingentLiabilitiesAndContingentAssetsExplanatory |
| 800500 | ifrs-full:DisclosureOfRegulatoryDeferralAccountsExplanatory |
| 831150 | ifrs-full:DisclosureOfRevenueFromContractsWithCustomersExplanatory |
There are 252 elements in total (ESEF Regulation as of 7.3.2022). Of these, 18 are of type "string". There are three "special" tags in the list that are not of the text block or string type. These are mandatory numeric tags relating to dividends, which may need to be tagged as numbers in the text of the notes. The text block tags are intended for larger pieces of information, which may also include tables and images. Of the 231 text blocks
- 133 are used to mark up the disclosures. The names of these elements start with "Disclosure of XY".
- 96 are used for the accounting policies. The names of these elements start with "Description of accounting policy for XY".
- 1 to mark up the "Statement of IFRS compliance".
- 1 to tag the entire notes section ("Disclosure of notes and other explanatory information"). Whether this tag needs to be used at all is currently the subject of heated debate.
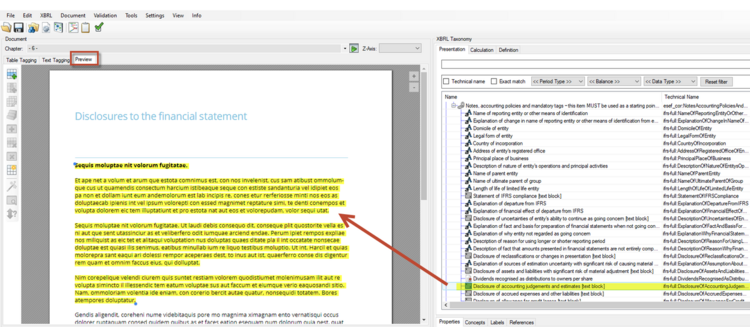
To continue with Textblock Tagging in toolsxbrl, select the tab with the same name on the left-hand side of the application if you tag Word or switch to Preview if working with the PDF.
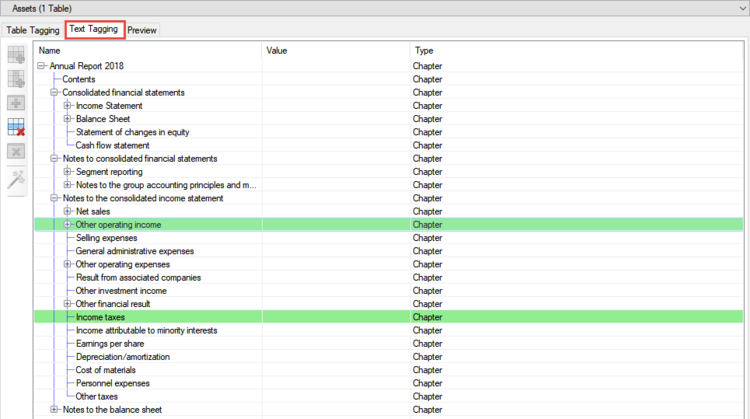
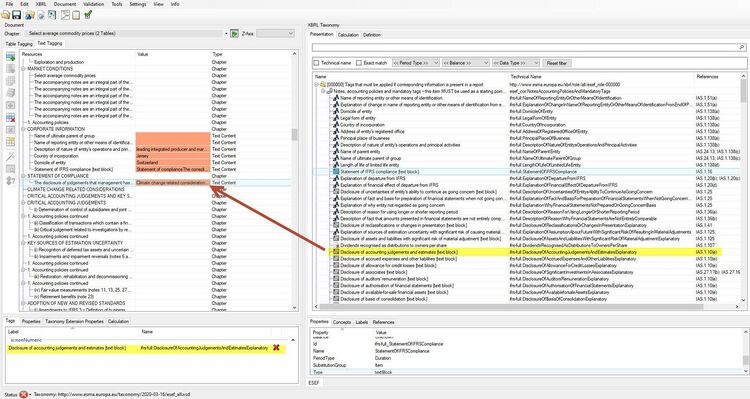
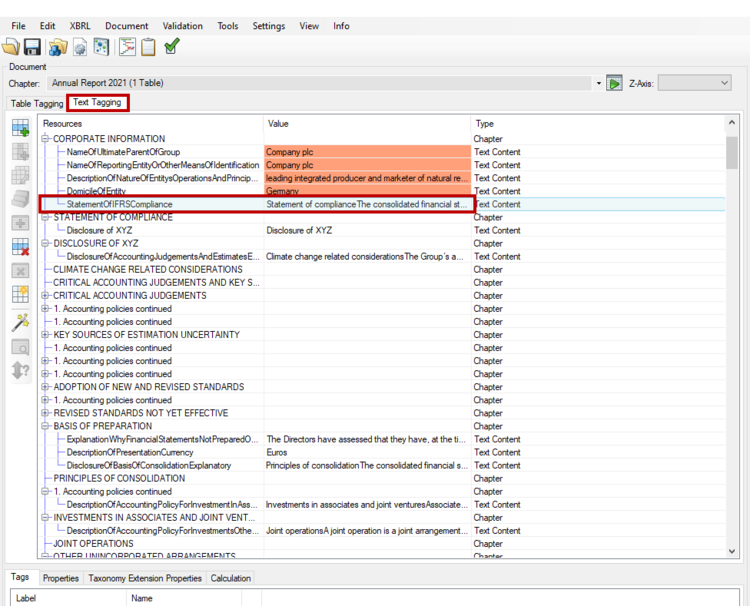
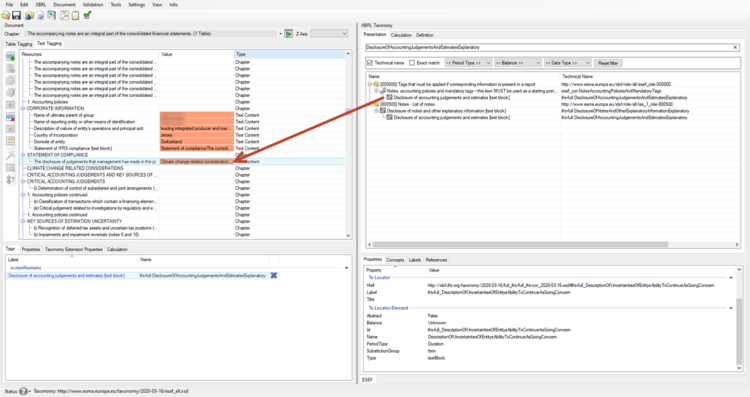
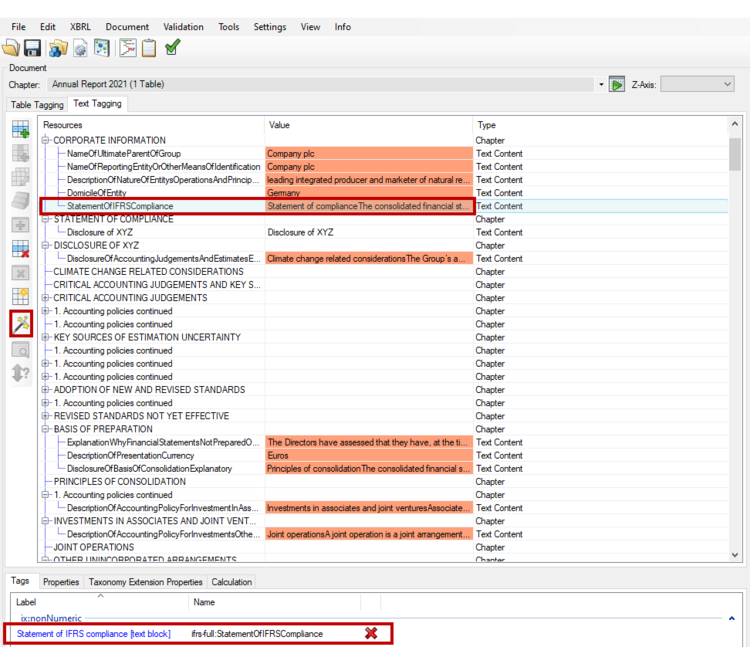
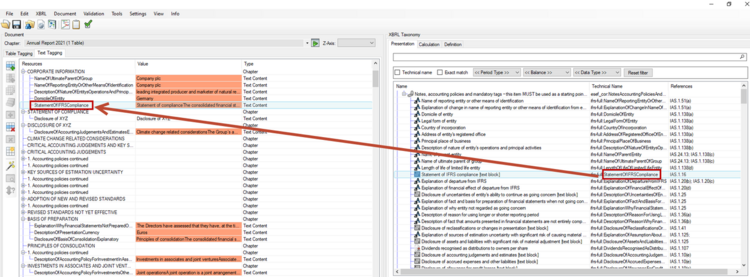
To tag a chapter with an element from the taxonomy, find the element in the taxonomy and then drag and drop it onto the selected chapter. After successful tagging the element name and label will be displayed beside the chapter name. If a chapter is tagged, all sub-chapters will be automatically part of the tag.
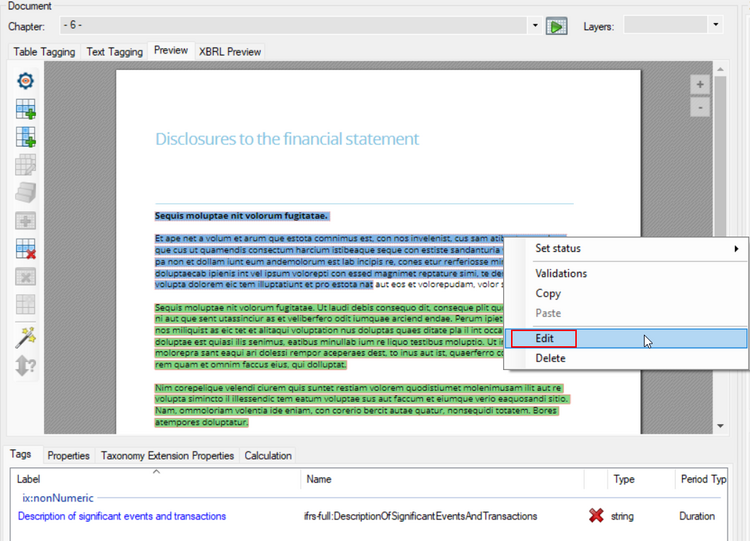
Textblock tags can be edited to modify the tagged area by right clicking the textblock and selecting “Edit”.
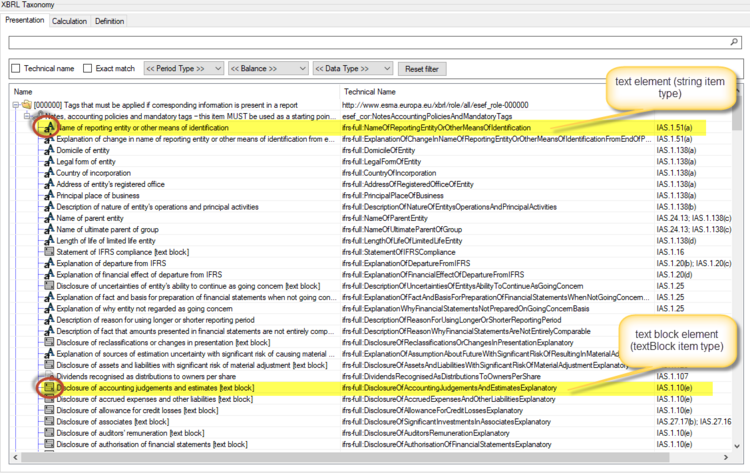
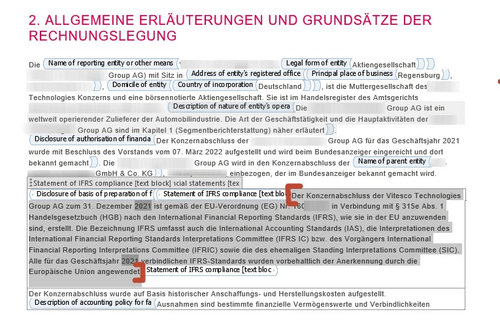
ESEF may require tagging of individual words or sentences (e.g. name of the reporting entity) and tagging of blocks of text (e.g. DisclosureOfAccountingJudgementsAndEstimatesExplanatory), these items are of different types (string and textBlock) and have different icons in the ESEF taxonomy in toolsxbrl:
Text
denotes that the element type is text (a sequence of alphanumeric characters); it is used to mark up short pieces of narrative information; text elements are non-numeric line items
Text block
denotes that the element type is a block of text; it is used to mark up larger pieces of information, such as notes, accounting policies or tables; text blocks are non-numeric line items
Tagging of Textblocks (Notes) & Mandatory Items in Word
toolsxbrl allows the tagging of individual words or sentences as well as complete chapters/subchapters of the document. To continue with Textblock Tagging, select the "Text Tagging" tab on the left-hand side of the application. To tag a chapter with an element from the taxonomy, find the element in the taxonomy and then drag and drop it onto the selected chapter. After the successful tagging the element name and label will be displayed under Tags.
If the item you need to tag is not available under "Text Tagging", there are two options to add it to the list, either with a content control or with a comment.
Create a Content Control
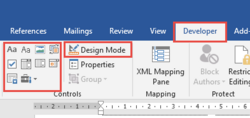
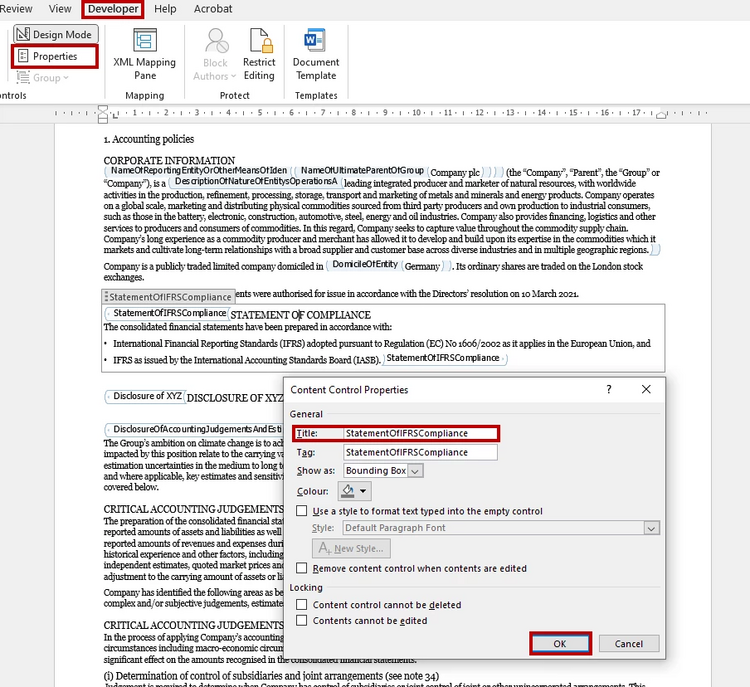
To create a content control, close toolsxbrl and open your Word file; then go to the "Developer" tab.
Developer Tab
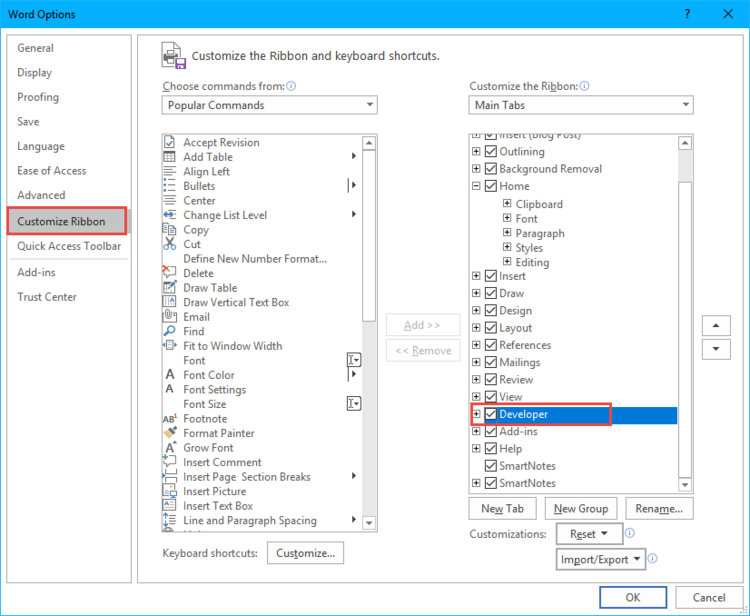
If you cannot see the "Developer" tab, go to: File-> Options-> Customize Ribbon and then activate the "Developer" tab
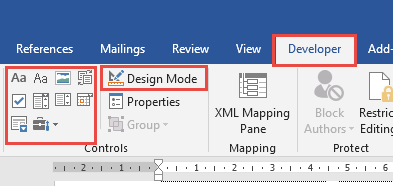
Select the required text/ text block and insert a content control.
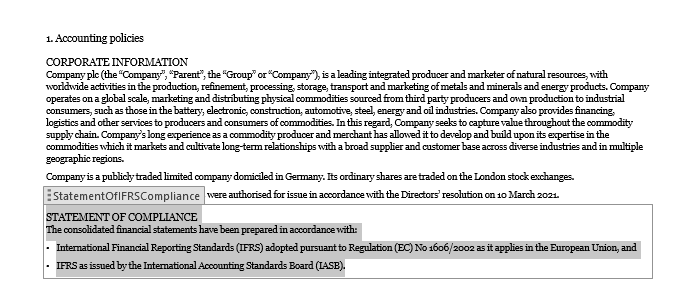
Design Mode
If "Design Mode" is activated, content controls are always displayed.
Design Mode can be used for detection of the beginning and end of content control, this is especially useful if you have several nested text blocks and you need to edit the contents inside one of the text blocks. Design Mode can help you to insert or remove the texts in/from the right text block:
Content Control Properties
For a better detection of content controls in toolsxbrl you can provide the content control in Word with a title that is easy to find. After creating a new content control go to Properties and add a title:
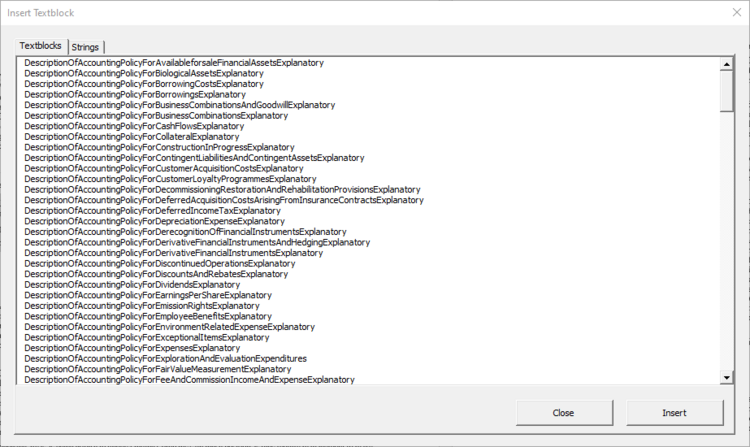
Add-In Insert Text Blocks
To save your time when creating content controls, you can install the following Add-In:
Save this file in the startup folder of Word (%appdata%\Microsoft\Word\Startup):
Open Word report, select the passage that requires a tag and press
- ALT+T or
- ALT+F8 and „showTextblockForm“ → Run
The dialogue with text blocks and string elements appears, just select one from the list and press "Insert":
The selected passage gets the content control with the technical name of the tag:
Importing Tags From Word Document to toolsxbrl
After you open the updated Word file in toolsxbrl, the first column displays the title of your content control:
Save the changes in your Word file and close it. Open your Word file in toolsxbrl and switch to "Text Tagging" tab -> Text Content is displayed now. You can start tagging the text blocks and text (drag &drop):
You can also use the auto tagger function for tagging. If you add the technical name of the text block/element under content control properties, toolsxbrl detects these and tags automatically:
Please make sure that you use the same technical name as in the ESEF taxonomy, without the ifrs-full prefix:
Alternatively, you can simply add a comment in the Word file. Then toolsxbrl will also display the commented text.
Tagging of Textblocks (Notes) & Mandatory Items in PDF
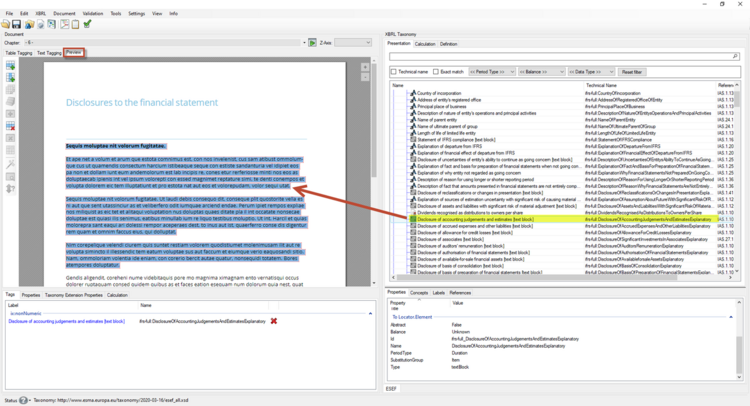
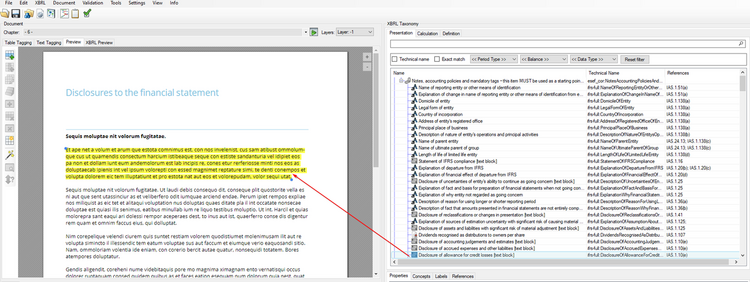
toolsxbrl allows the tagging of individual words or sentences as well as complete chapters/subchapters of the document. To continue with Textblock Tagging, select the tab "Preview" on the left-hand side of the application. To tag a chapter with an element from the taxonomy, find the element in the taxonomy and then drag and drop it onto the selected chapter. After the successful tagging the element name and label will be displayed under Tags.
"Preview" Tab
"Preview" displays a preview of the HTML conversion for the currently selected page. If you have loaded an EPUB or a PDF document you can mark the texts and tag them directly here.
Double/Multiple Textblock Tagging for PDF Documents
In some reports some content has to be tagged more than once. This can be two tags for the same text or a text block around a table that is already tagged. In toolsxbrl, this can be achieved by adding tagging layers to PDF documents. Each layer can then be tagged independently. When creating a result document, all the tags will be merged according to the iXBRL specifications.
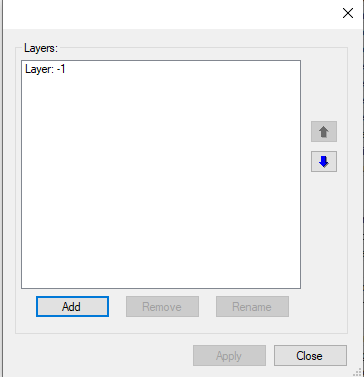
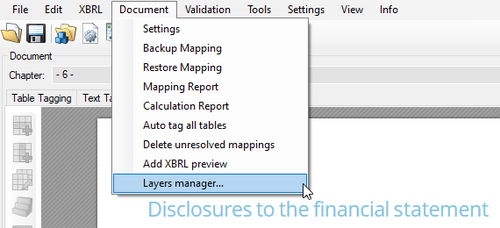
To get started, first load your document as usual and then add a new layer via the layers manager:
While one additional layer is enough for most reports, it is possible to add more than that. After clicking on apply you can select the new layer in the Layers dropdown, with "[..]" being your default layer:
Once you switch the layer, you will see that all current tags have been hidden in the other layer and you can tag on a blank page.
- If you want to create an additional textblock tag around the table, just select the table and tag the textblock.
- If you want to tag the same text twice, just select and tag it in both layers.
When you now create a result document and select the nested text block in the preview, the viewer will show two tags and the tags are properly nested in the document:
Tagging of 1 Element for the Whole Notes Section (“Disclosure of notes and other explanatory information [text block]”)
If you need to set a big text block that includes many pages of the report, you can use the option “Tagging text block from page to page”.
Tag the beginning of the text block (complete first page of the desired text block)
Tag the end of the text block (complete last page of the desired text block)
Right click on the end of the text block and click on “Tagging text block from page to page”:
All pages in between the beginning and the end of your text block have now been included in the same tag:
It is recommended to create a separate layer for this text block in your PDF.
To insert the whole notes section (“Disclosure of notes and other explanatory information [text block]”) into your word document, you need to select all the desired text from your document and insert the Content Control and the Technical Name as you would do for any other tag; however, please note that the selection of the text must be made under a headline, for example the first one in the document.
How to Tag HTML Table Tags in the Textblock Section of PDF Documents
When tagging a PDF file, some audit firms might request you to have all tables in the notes section in the final report tagged with an (X)HTML table tag. In contrast to taggings of MS Word files, toolsxbrl does not include HTML tags automatically for PDF documents. The table tag provides structural meaning in a way that it signals that a table exists and that it has columns and rows. Find more information about the table tags here: HTML table tag
PDF HTML Table tagging is available in toolsxbrl.
Even if the benefits of having HTML-Table tags are very limited and neither the XBRL specification nor ESMA define requirement for having table tags (neither in the ESEF Regulation nor in the ESEF Reporting Manual), some audit firms make it a requirement. Detailed monetary tagging of the actual numbers of the table would be way more useful to consumers of the data, because the table tag provides no semantic meaning on the content of the table itself. To fulfil this requirement and manually add table tags in the textblock section of tagged PDF documents, you have to perform these steps:
Load your tagged PDF document into toolsxbrl. In the Settings dialogue you have to set the Create table tag for Text Block Tagged Tables option to True.
Before applying the TextBlock Tags you have to prepare the tables in the document. First, you need to add an additional layer to the document.
Mark the whole table on the new layer and double click on it.
After double clicking on it, the table should be surrounded by a blue box:
Go back to your first layer. Now you can add a TextBlock Tag of your choice:
There is no need to add a table tag here. These are just needed if there are tagged values in the table. However, you have to make sure that the of @escaped attribute: True/False Escape-Attribute is set to True.
Tables with a Table Tag will also fulfill the new requirement.
When generating the XBRL report, the corresponding tables will have an HTML-table tag.
How to Prove That XHTML Table Tags Exist
In order to prove that a table tag indeed exists in the XHTML, please open the report in a Web browser like Chrome, scroll to the relevant table and right click the first cell in the table and click “Inspect”.
A new window will open showing the HTML source code. If there is a table, tr or td tag, it means the table has a table tag.
Import Word Document Text Blocks
This feature allows the import of text block tags from a tagged Word document into a PDF. It restores all tagged text blocks, including nested tags. Both documents need to be based on the same content version.
To perform the import of Word text blocks into your PDF, perform the following steps:
Open the target PDF in toolsxbrl with default settings.
Open “Tools” section and choose “Import Word document text blocks…” option:
Select the tagged Word document.
When restored you can see the tags as usual in both the Preview and Text Tagging tab.
Creating Textblock Extensions
In order to create XBRL taxonomy extensions for text content, the corresponding content must be selected in the "Preview" tab (when tagging PDF) or in the "Text content" tab (when tagging Word) as described above.
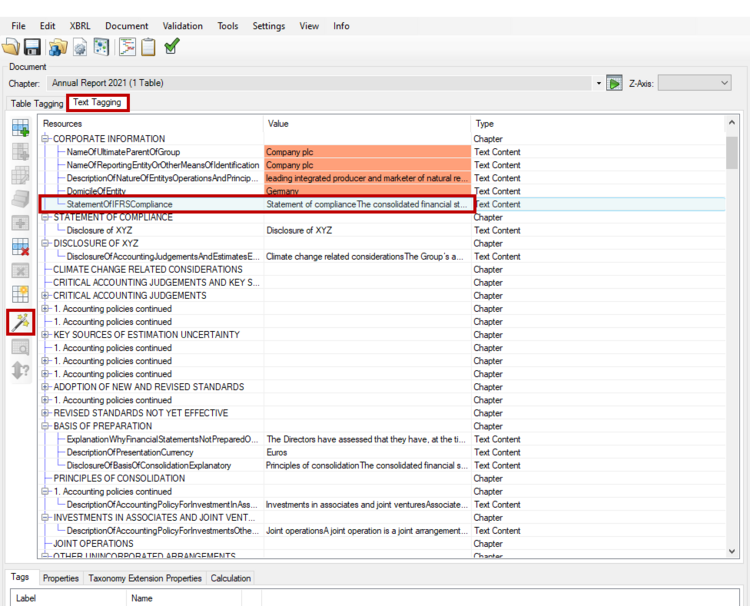
After the corresponding text content is selected, an XBRL taxonomy extension can be created by clicking on the second button from the left hand side toolbar.
It is important to set the "Item type" property to "Textblock" and adjust the other properties of the newly created extension as shown in the screenshot below:
Please note, it is important to use the exact same "Element name" for extension when using Continuations (see below).
Continuation
The text that belongs to a single XBRL text block or text tag might be found in several places in the same document. XBRL has a mechanism called continuation for these cases that essentially instructs the XBRL processors to merge all the content that has been tagged with the same tag and is part of the continuation for the output. To achieve this result with toolsxbrl, follow the steps below.
firesys Version 22.1.1 and newer:
Confirm the question with a "yes" if you wish to create continuation for the text block:
Additionally, from Version 22.3.1 and later, it is possible to jump between all continuations of the text block tag by right clicking one instance and choosing “jump to head/next/previous”. This functionality updates automatically on deletion of an element and jumps to the element before/after the deleted one, keeping the sequence of the remaining elements as before.
firesys Version 22.1.0 and older:
For PDF documents, simply tag two or more text items with the same XBRL element, select the text item that should be continued and select the next text item in the Properties Tab by clicking Continued At:
For Word documents, tag the first part of the text block, select it and go to the Properties Tab → Continued At. Select the text item that should serve as continuation of the text block and click on OK:
Continuation Administration
Having a lot of textblock-tags and continuations in your report sometimes makes it hard to ensure the correct order of your continuations for a specific textblock. With the new Continuation Administration in toolsxbrl the managing of this issue has now gotten a lot easier.
Simply right click on a tag or a continuation for the tag in question and click on Continuation Administration:
This will open up a dialog where all tags belonging to this continuation chain are displayed in hierarchical order:
You can now use this dialog to manually rearrange the order of continuation simply by dragging and dropping the lines to the desired position, or by using the auto-order functionality (6) that re-arranges the content of tags in the order it appears in the document.
- Label of the textblock for this continuation chain.
- Technical name of the textblock for this continuation chain.
- First part of the content of the textblock.
- Chapter or Page where the tag has been set to.
- Position of this textblock in the report.
- Auto-order all textblocks by appearance in document.
By double clicking a line in the dialog, toolsxbrl will also automatically jump to the position of that tag in the textblock-tab.
By clicking Save, the continuation chain will be rearranged in the desired order.
Delete Continuation Chain
If you want to delete all tags belonging to a certain continuation chain, just right click on one element of the chain and select "Delete Continuation Chain".
Tag Filtering
Sometimes textblock-tags are spread out through the whole document and it is difficult to find the tags belonging to a chain, for example when checking for duplicates. By right-clicking one item having a tag or belonging to a continuation chain with that tag, you can select "Filter By Tag" to show all textblock-tags in the document with that particular tag.
By choosing "Reset Filter" the filter will be removed.
Furthermore it is possible to filter for multiple tags or even layers by right-clicking the column header:
Just click on Apply to filter according to your selection. To remove the selection, click on Clear All Filters.
Change the "Escape" Attribute in the Textblocks
All text block tags can be given a so-called escape attribute, which controls whether the XHTML tags should be included in the XBRL instance document or not. By default, the escape attribute is set to False, according to Guidiance 2.2.6 of the ESEF Reporting Manual (page 33). Changing it to True is not necessary, but is recommended by some auditors.
When the Escape attribute is set to True, some iXBRL viewers display the tag contents with more spaces. However, this depends on the iXBRL viewer used and is by no means standardised.
When tagging a PDF file, some audit firms might request you to have all tables in the notes section in the final report tagged with an (X)HTML table tag. In contrast to taggings of MS Word files, toolsxbrl does not include HTML tags automatically for PDF documents. For this, you have to make sure, that the Escape-Attribut is set to True.
To change the Escape attribute for all TextBloks go to Document → Toolbox:
In the Toolbox dialog, follow the three steps below:
Mini Disclosure Checklist
New feature in toolsxbrl firesys Version 22.3.1 and newer.
The validation by default checks text block tags against all references in the taxonomy. The Mini Disclosure Checklist allows the selection of the references the validation checks against. The validation then only generates warnings for missing tags referenced by that selection.
To enable this feature go to Document → Settings
In the “Options” area, click once into the empty area next to “References to check”, then on the three ellipsis on the right side:
Select the references to be checked against in the “Mini Disclosure Checklist”:
Siehe auch
Weitere Inhalte
→ Webseite
→ Kundenbereich
→ YouTube
