The page layout
When working with firesys, if you are in the “*Layout” menu ribbon, you can quickly access tools that assist you with creating and maintaining your document layout.
 Position element
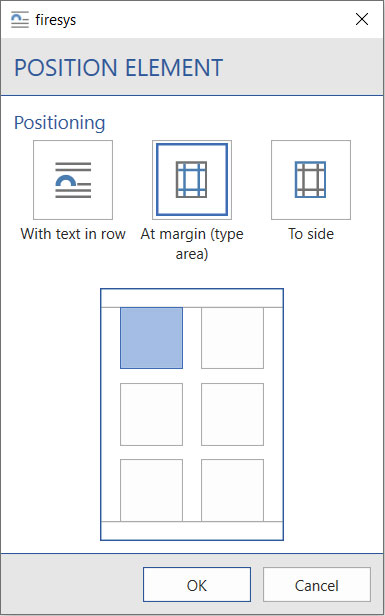
Positions a table, frame or graphics at fixed positions on the page. There are six selection options for aligning the object with either the page margin (type area) or the outer edge of the page.
 Layout functions
 Page numbering
Here you can define with which parameters the page numbers in your document should be defined. The generally required number format can be defined and you can also determine whether and with which formatting chapter numbers should be displayed.
 Type area
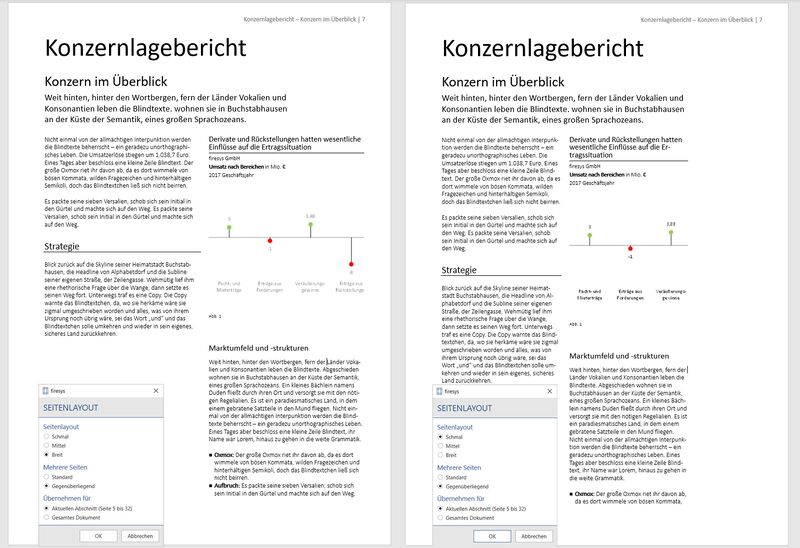
Select the type area for the current section or the entire document. In the example you see two pages with identical contents. The page on the left was formatted with the “Wide” type area that is defined by firesys; the page on the right is formatted with the “Narrow” type area which is also defined. You can also select to which part of your document you want to apply the required type area setting – and whether your type area should be adapted to the desired display of left and right pages (important for an ideal layout in book format) of your document.
How to adjust the type area in your document:
-
On the "*Design" tab, in the "Page layout" group, click the "Layout functions" button and, in the submenu, click "Type area".
-
A dialog opens where you can choose between different settings for the page layout.
-
Click on the settings that you want to use for your layout.
The selected settings are applied to the document.
Good to know
| |
|---|---|
The settings and the selection of the type area depend on the customer-specific layout. |
 1, 2 columns
Changes the number of text columns for the current section. This affects:
- the section your cursor is in (nothing is selected).
- the highlighted text (a section break is inserted before and after this section).
Good to know
| |
|---|---|
The settings for multiple columns in your document are customer-specific and are stored in your MeetingPoint - so this menu can also display other column configurations (e.g. also for three columns). |
 Document information on/off
Hides/unhides the internal information line in the footer. This line can contain the file name and additional information (saved by/on/at (time)...). Please note: If paragraph marks are unhidden, hidden text is displayed dotted but is not printed.
 Space after on/off
Sets the space after a paragraph to the default style or to 0.
See also
![]() All formatting options in Word
All formatting options in Word
![]() The StyleGuide
The StyleGuide
![]() Highlight text
Highlight text
![]() Line breaks in firesys
Line breaks in firesys
![]() Special characters in firesys
Special characters in firesys


