The rolling forward function
Use the rolling forward function in Excel to prepare your report for the next quarter or financial year. After the setup process, you will now benefit from the “automatic” rolling forward process. The current worksheet, the entire workbook or the validations can be rolled forward optionally.
<imagemap>Datei:EN_Menüband_Excel_Inhalt_Vorrollen.jpg|1200px|center
desc none </imagemap>
The rolling forward function
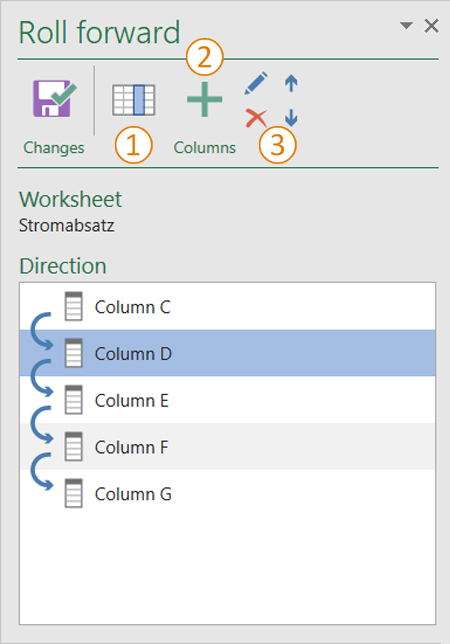
In the first step you define the columns for the rolling forward function. This is done by using the “Rolling forward” dialog, which you can access via the Excel menu ribbon (see screenshot).
 Display columns
Selects all columns on the worksheet that were defined for rolling forward.
 Add columns
Select a column which should be rolled forward in future. To add a column, you simply need to position the cursor in any cell in this column and to press the button.
Good to know
| |
|---|---|
Columns outside of the print area can also be marked for the rolling forward process. Columns to be rolled forward do not necessarily have to be next to each other. |
 Change, remove and move columns
Of course, all columns to be rolled forward can be changed or removed or their sequence can be changed.
Good to know
| |
|---|---|
Tables with horizontally linked cells cannot be rolled forward. |
See also
![]() The worksheet status in Excel
The worksheet status in Excel
![]() The StatusCockpit
The StatusCockpit
![]() The worksheet inspector
The worksheet inspector
![]() The worksheet navigator
The worksheet navigator
![]() The worksheet status in Excel
The worksheet status in Excel
![]() Coloured highlighting in Excel
Coloured highlighting in Excel
