Overview of the Excel data manager: Unterschied zwischen den Versionen
Keine Bearbeitungszusammenfassung |
Keine Bearbeitungszusammenfassung |
||
| Zeile 38: | Zeile 38: | ||
On the sample screen, a maximum configuration of all possible variants is prepared. The individual icons are then explained. | On the sample screen, a maximum configuration of all possible variants is prepared. The individual icons are then explained. | ||
[[Datei:Word Inhalt Excel-Daten-Manager Daten-Objekt-Optionen.jpg|center|1000px]] | [[Datei:EN Word Inhalt Excel-Daten-Manager Daten-Objekt-Optionen.jpg|center|1000px]] | ||
| Zeile 292: | Zeile 292: | ||
Indicates layout issues between the Excel source and the Word document (manually changed cell widths in tables in Word, incorrect assignments of row types in Excel, missing font types for conditional formatting or struckthrough cells with content on your computer or else contents were found in struckthrough cells in Excel). | Indicates layout issues between the Excel source and the Word document (manually changed cell widths in tables in Word, incorrect assignments of row types in Excel, missing font types for conditional formatting or struckthrough cells with content on your computer or else contents were found in struckthrough cells in Excel). | ||
<br> <br> | <br> <br> | ||
[[File:EMD hellgelb. | [[File:EN EMD hellgelb.jpg|thumb|center|700px|Yellow vertical highlighting: layout warnings]] | ||
=== Orange vertical highlighting: content-related warnings === | === Orange vertical highlighting: content-related warnings === | ||
Indicates errors within the Excel source (such as a validation problem with toolsvalidation, division by zero, missing reference or missing languagewords translation). | Indicates errors within the Excel source (such as a validation problem with toolsvalidation, division by zero, missing reference or missing languagewords translation). | ||
<br> <br> | <br> <br> | ||
[[File:EMD gelb. | [[File:EN EMD gelb.jpg|center|thumb|700px|Orange vertical highlighting: content-related warnings]] | ||
=== Red vertical highlighting: problems === | === Red vertical highlighting: problems === | ||
Indicates objects which cannot be updated because a problem has occurred. Expanding the object displays the problem and a solution suggestion. <br> <br> | Indicates objects which cannot be updated because a problem has occurred. Expanding the object displays the problem and a solution suggestion. <br> <br> | ||
[[File:EMD rot. | [[File:EN EMD rot.jpg|center|thumb|700px|Red vertical highlighting: problems]] | ||
=== Additional information === | === Additional information === | ||
Aktuelle Version vom 15. März 2023, 13:18 Uhr
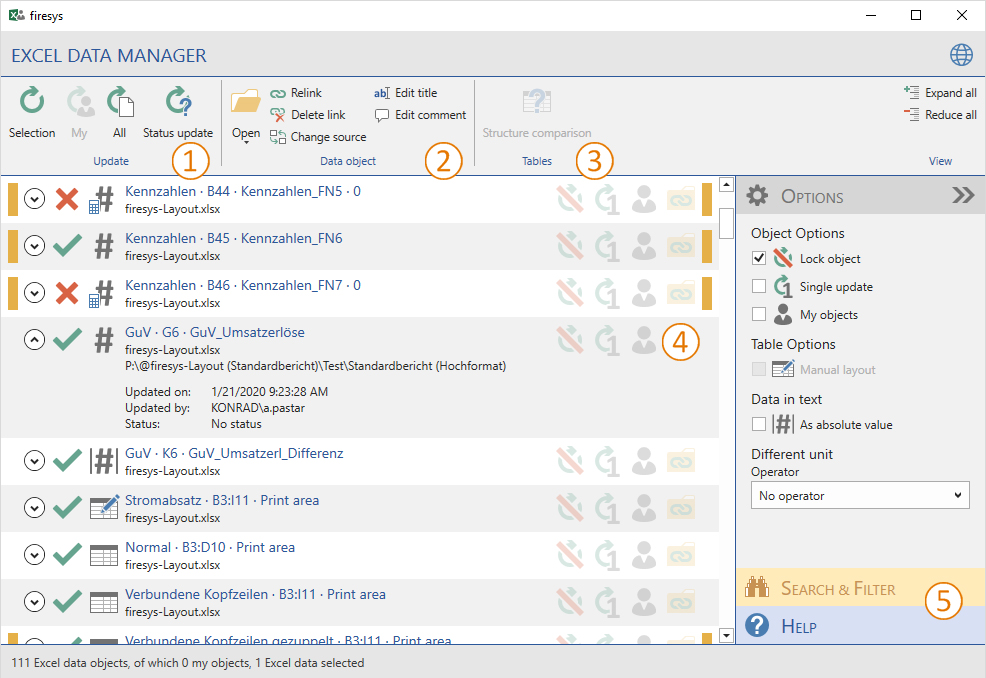
Interface of the Excel data manager
The “control centre” monitoring all data that is imported and updated from Excel. It is divided into an action area and an option area. You can find all information on editing tables on the “Actions” tab. You can find further information on settings in the “Options” task area.
| Update functions | You can use these functions to update your linked Excel data with one click. This means that your business report always contains correctly maintained values. See # Excel data manager – the update functions for details. | |
| Data object options | The data object options in the Excel data manager support you when working with your Excel documents. For example, you can quickly design a manual layout for an Excel table. See #Data object options for details. | |
| Structure comparison | Opens a browser window in which the structures from the Excel range and the Word table are compared. | |
| List view | Here you can find information on all Excel objects linked to the document. For example, you can double-click on an object to navigate to this object and highlight it. See #List view for details. | |
| Filter & help functions | You can simplify working with the Excel data manager by using filters to structure how information is displayed. If you still have any questions about its functions, the integrated help menu will assist you further. See #Search and help function for details. |
Excel data manager – the update functions
To ensure that linked Excel objects in your Word document are always up to date, you can use the update functions to update existing Excel objects quickly. You can choose whether you want to update only one object, all objects that are currently selected, or all objects that are linked in the Excel data manager.
Overview update functions
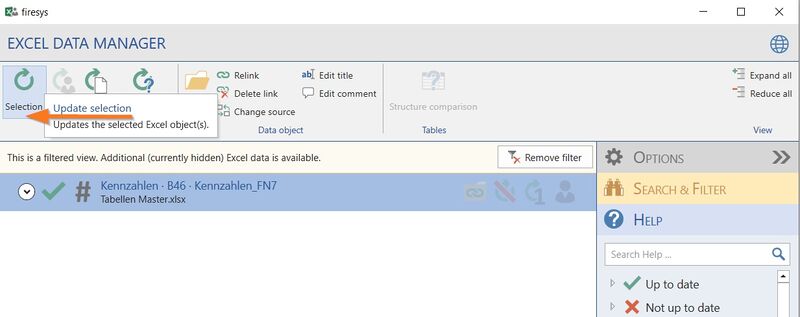
![]() Update selection
Update selection
Checks and updates the selected object or objects in the list. The system checks the linked Excel objects for changes in content and structure and, if changes have occurred since the last update, updates the data in your Word document.
![]() Update my objects
Update my objects
Updates all Excel objects labelled as “my objects”.
![]() Update all
Update all
Checks and updates all Excel objects contained in your document and creates an update report, which also indicates if any problems occurred during the update (for more information, see Update/troubleshooting).
Good to know
| |
|---|---|
Avoid working on your Excel documents while Excel data is being updated. |
![]() Status update
Status update
Checks whether the selected Excel objects (and objects linked to them) are up to date and updates the information in the list. The Excel objects are not updated.
Video: Status update
This is how you update linked Excel objects with firesys, in three different ways:
-
Option 1: By using the “Update” function in the menu ribbon (shown in this video)
-
Use the mouse pointer to select a linked Excel object that you want to update.
-
In the “*Content” menu ribbon, in the “Excel data manager” group, click on the “Update” button.
→ A progress dialog appears.
Note:The “Update all Excel objects” function is also available on the split button.
→The Excel object was updated. -
Option 2: By using the context-sensitive menu in firesys
-
Use the mouse pointer to select a linked Excel object that you want to update.
-
Right-click in the object’s area.
→The context-sensitive menu appears. -
Here you can select the “Update” function.
→ A progress dialog then appears.
→ The Excel object was updated. -
Option 3: By using the menu ribbon in the Excel data manager
-
Use the mouse pointer to select a linked Excel object that you want to update.
-
In the “*Content” menu ribbon, in the “Excel data manager” group, click on the “Excel data manager” button.
→This opens the Excel data manager and the “Update” ribbon contains the update functions. -
Here you can choose whether you want to update all or just the selected Excel objects.
→A progress dialog then appears.
→ The Excel object(s) are updated.
Video: Select language
To change the language in the Excel file and change in Word:
-
In Excel, click on the button “Select language” on the tab “*Translation” in the group “Dictionary”.
-
Select the desired target language from the drop-down menu.
→ The data in the Excel file is translated in real time. -
Save your Excel file and open the Word document containing the translated data.
-
Click on the “*Publish” tab in Word.
-
In the “Language and number format” group, select the desired target language from the drop-down menu.
-
Then select all the Excel data in the text whose language is to be changed.
-
On the “*Contents” tab in the “Excel data” group, click on the “Update” button.
→ Your data will be translated.
Note: The number format set for the target language is also applied.
Data object options
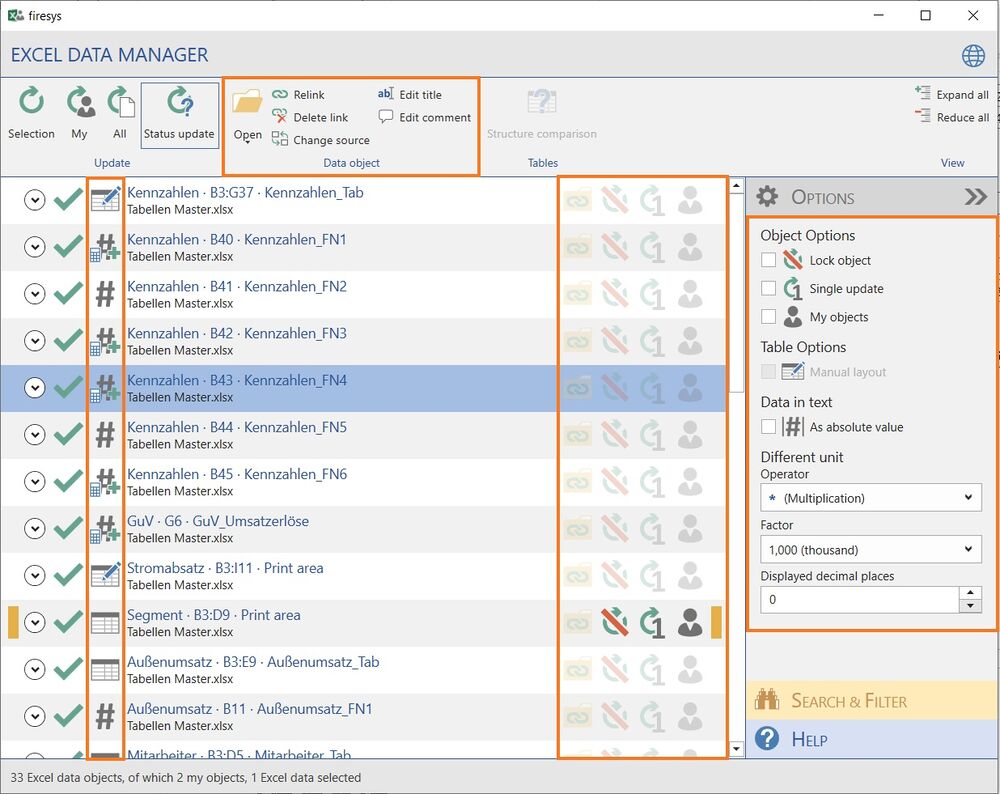
The Excel Data Manager offers you a quick overview of all connected Excel objects. All status information is displayed here in a list area. The Excel data manager also contains a menu area above the list area and a page area with additional functions, which also offers additional help content. When working with firesys, Excel contents can be connected to Word in different configurations (the so-called data object options). This data-object relationship defines the structural alignment of the individual Excel objects (for example, as a linked table element or data in a text object). You can already get an overview of the configuration of the individual Excel objects in the list view using symbols.
On the sample screen, a maximum configuration of all possible variants is prepared. The individual icons are then explained.
Opens the Excel source file, displays the worksheet and marks the range selected in the list where the object originates. |
| Open folder
Opens the folder where the Excel source file is stored. |
Changes the connection of an object (to another worksheet or file) or restores a broken connection. |
Removes the link to the Excel source. Tables are no longer displayed in the Excel Data Manager and can therefore no longer be updated. |
Good to know
| |
|---|---|
The “Delete link” option transforms data in text into normal text. |
Change the name or location (path) of the Excel source file. | ||||||||||||||||||||||||||||||||
Create or edit the title of the selected object to make it easier to find in the Excel data manager or by using the “Search” function. Assigned titles are transferred from toolsweb to Excel. | ||||||||||||||||||||||||||||||||
You can write “comments” on your Excel object to make it easier to find in the Excel Data Manager or by using the “Search” function.
Data object options in the list view
List viewIn the list view you can find information on all Excel objects linked to the document. By double-clicking on an object in the window, you navigate to the relevant object and select it. You must close the Excel data manager before you can continue working in the Word document. To edit multiple objects at once, select these by holding down the shift or control key.
Yellow vertical highlighting: layout warningsIndicates layout issues between the Excel source and the Word document (manually changed cell widths in tables in Word, incorrect assignments of row types in Excel, missing font types for conditional formatting or struckthrough cells with content on your computer or else contents were found in struckthrough cells in Excel).
Indicates errors within the Excel source (such as a validation problem with toolsvalidation, division by zero, missing reference or missing languagewords translation).
Red vertical highlighting: problemsIndicates objects which cannot be updated because a problem has occurred. Expanding the object displays the problem and a solution suggestion. Additional informationClicking on the left arrow expands the objects and shows additional information (see also “View”). In the problem/solution suggestion area, if applicable, an explanation is given why an object was not updated in the last update process. Here you will also find the toolsvalidation status information.
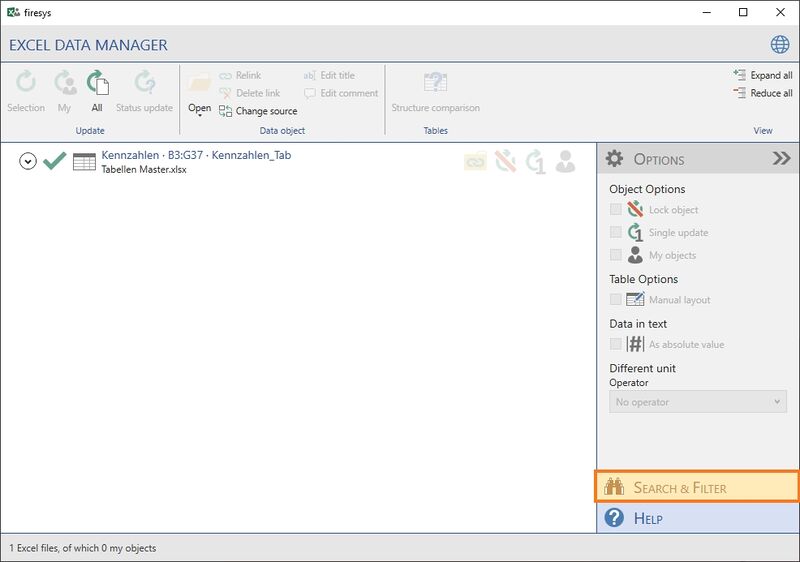
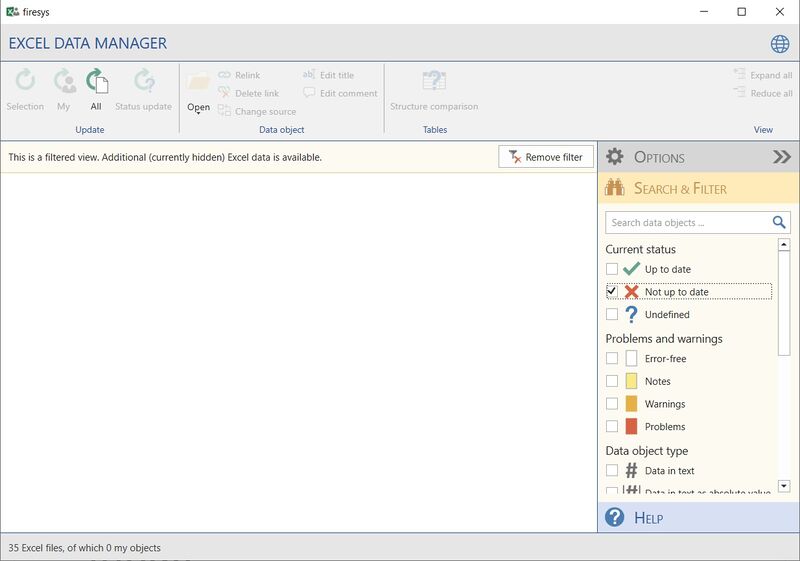
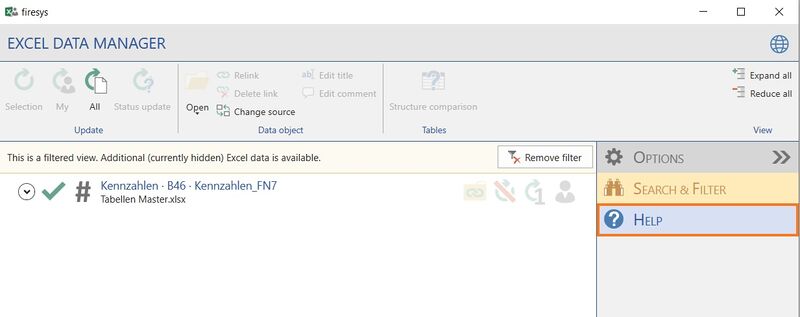
Search and help functionYou can simplify working with the firesys managers by using filters to structure how information is displayed. If you still have any questions about its functions, the integrated help menu will assist you further. This article uses the Excel data manager interface to represent the content and graphics manager. The search & filter functionYou find the search & filter function in the expandable work area on the right-hand side.
The help functionIf you have a question regarding the functionality of the firesys manager, you can use the integrated help menu at any time.
Video: The help and search function in the managers
The explanation of the individual steps in detail
How to use the help and search function in the firesys managers:
Note: The help and search function is shown as an example for all managers using the Excel data manager. See more
Further contents |
