Status and highlighting
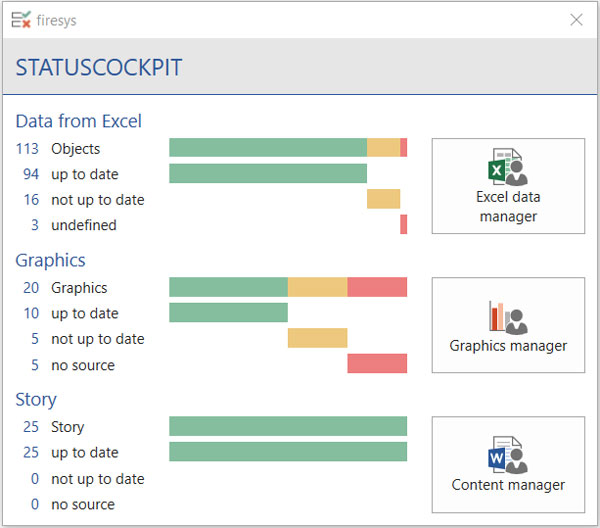
By using coloured highlighting, which you can switch on and off, you can display linked elements in your firesys document. The “Status” function provides an overview of the current status of linked Excel data, graphics and stories.
Status
Status
Shows the status of all linked objects. This dialog box displays the number and status of all linked Excel data and graphics as well as the individual stories (if you are working in a master).
Click to open the relevant manager. If Excel data is marked as “Undefined”, first open the Excel Data Manager and carry out a “Status update” (for a more detailed explanation, see “The Excel data manager”).
Content Controls
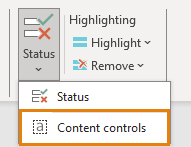
In firesys, content controls are used for various functions. With the ‘Content Controls’ function in the ‘Status’ menu, you can display the number of all content controls in the document.
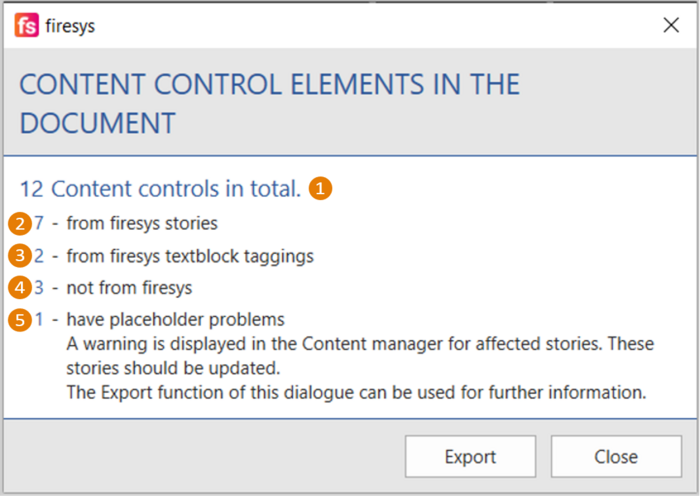
Displays the total number...
![]() ... of all existing content controls in the document.
... of all existing content controls in the document.
The number of the following categories is displayed below
![]() ... all the currently connected firesys stories
... all the currently connected firesys stories
![]() ... all the textblock Taggings present in the document
... all the textblock Taggings present in the document
![]() ... all content controls that were not created by firesys
... all content controls that were not created by firesys
![]() ... all content controls that contain placeholder problems (a warning is displayed in the Content manager for affected stories. These stories should be updated).
... all content controls that contain placeholder problems (a warning is displayed in the Content manager for affected stories. These stories should be updated).
The Export function of this dialogue can be used for further information.
All content controls are output in the workbook with the following information: consecutive number, the respective type (as explained above), name and any problems.
Highlighting
Sets/removes highlighting for linked objects. linktext can highlight the data (see Insert contents from Excel) that you have inserted from Excel into Word, so that you are always kept up-to-date about the current status. You can also highlight all stories inserted with linkdocuments. Once you have checked the document, you can remove the highlighting with just one click.
How to define coloured highlighting in firesys:
-
In Word, in the “*Content” menu ribbon, in the “Linked objects” group, click on the “Set” button in the “Selection” area.
→ A selection menu opensHere you can select whether you want to be supported by coloured highlighting for identifying data in text elements, lost Excel data links or firesys stories. -
Select the option you require.
→ The selected option is then executed and the coloured highlighting is displayed in Word.
Reference: If you no longer require the coloured highlighting that is currently set, you can use the “Remove” button to return the visual display to the its original status.
Good to know
| |
|---|---|
You can manage the automatic highlighting in the firesys settings under “Set highlighting”. |
Set highlighting
Set data in text
Highlights in green data that has been inserted into the body text from Excel.
Lost Excel data links
Highlights data that is imported from Excel in blue when the link to Excel is broken.
Story
Highlights stories (and fields) in grey. Caution: If stories are shaded, then no other highlights will be shown.
Remove highlighting
Selected object
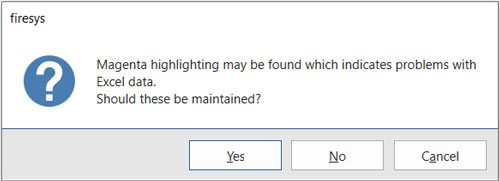
Removes the highlighting from the selected objects. If the selected object contains magenta-coloured highlighting, this indicates problems with the Excel data.

Decide whether you want to delete the highlighting as well, or whether the cause of the problem should be resolved (see Update/troubleshooting).
Previous Excel data change
Removes the turquoise-coloured highlighting from earlier changes.
Data in text
Removes the green highlighting of all data in the text linked to Excel.
Remove lost Excel data links
Removes the blue highlighting from all data that has lost its link to Excel.
Story
Removes the grey highlighting in stories.
All linked Excel data
Removes the highlighting of all objects (tables and text data) linked to Excel in the Word document.
See also
![]() Insert external contents into Word
Insert external contents into Word
![]() Insert contents from Excel into Word
Insert contents from Excel into Word
![]() Insert graphics
Insert graphics
![]() Working in the team with the content manager
Working in the team with the content manager
![]() The version manager
The version manager
![]() Manage files on SharePoint
Manage files on SharePoint
![]() Contents from WeSustain
Contents from WeSustain


